> ## Documentation Index
> Fetch the complete documentation index at: https://docs.fieldpal.ai/llms.txt
> Use this file to discover all available pages before exploring further.
# Conditional sections
> How to show fields only when another field's answer meets a condition.
A **Conditional section** is a group of fields that stays hidden on the form until another field on the same template is answered a certain way. Use it to ask follow-up questions only when they're relevant, instead of showing every possible field to every field worker.
For example: only ask for a damage description and photo when a condition rating comes back **Red**, or only ask for a reason when someone answers **No** to a checkbox.
## How it works
Every conditional section has three parts:
* **A trigger field** — one other field on the template, chosen from a dropdown of its siblings.
* **A list of matching values** — one or more values, one per line. The section appears if the trigger field's answer matches *any* value in the list (an OR match).
* **Inner fields** — the fields that only appear once the condition is met. These can be any field type, including short text, image upload, or PDF upload.
A conditional section can't use another conditional section as its trigger. The Field dropdown only lists non-conditional siblings.
## Step 1: Add a Conditional section field
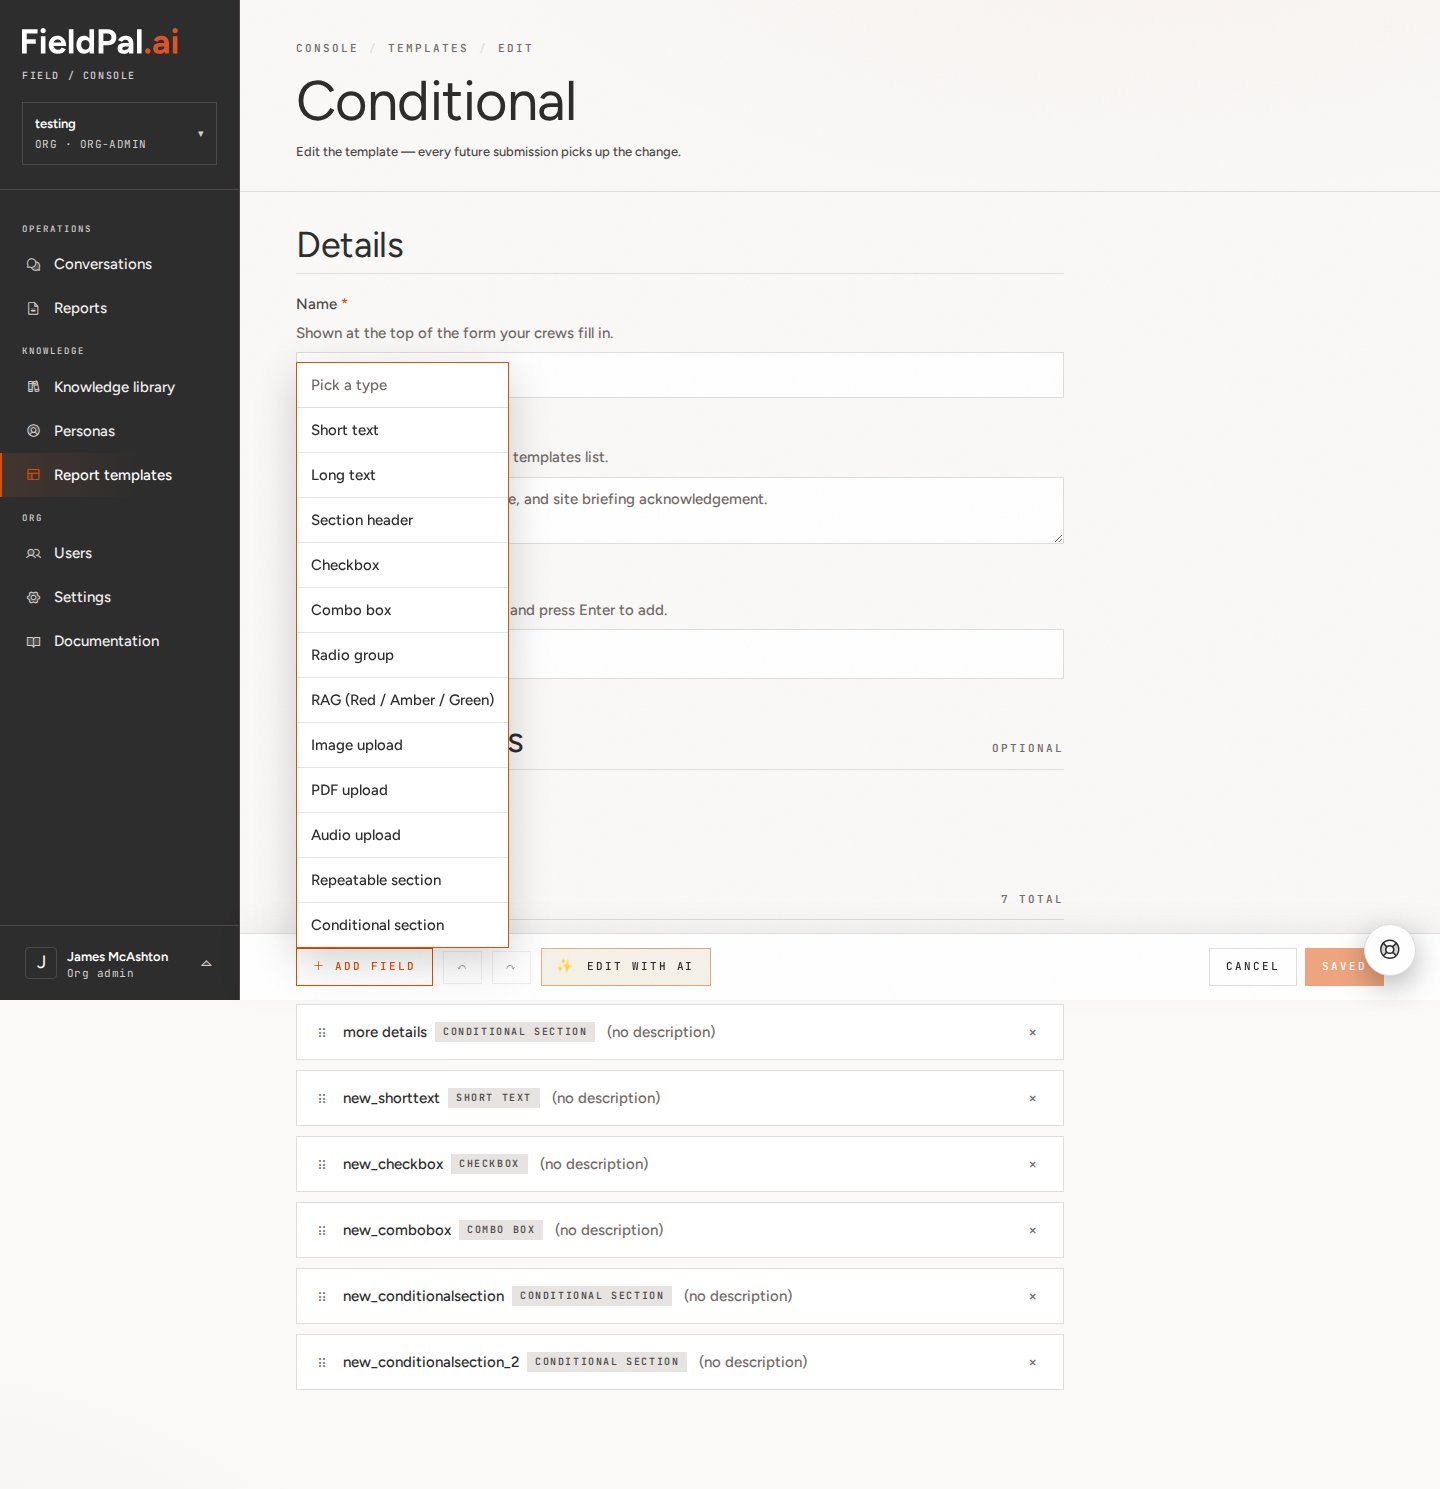
Open your template, scroll to the **Fields** section, and click **+ Add field**. Choose **Conditional section** from the bottom of the type picker.
 ## Step 2: Name the section
Click the new field row to open the **Edit field** panel. Set the **Field name** and, optionally, the **Section heading shown to the worker** — this defaults to the field name if left blank.
A **Section ID** is generated automatically from the section name.
Don't change the Section ID after reports have been submitted. It's a stable runtime key — changing it breaks references in reports that were already submitted using the old ID.
## Step 3: Set the trigger field and matching values
Scroll down in the panel to **Show this section when…**.
## Step 2: Name the section
Click the new field row to open the **Edit field** panel. Set the **Field name** and, optionally, the **Section heading shown to the worker** — this defaults to the field name if left blank.
A **Section ID** is generated automatically from the section name.
Don't change the Section ID after reports have been submitted. It's a stable runtime key — changing it breaks references in reports that were already submitted using the old ID.
## Step 3: Set the trigger field and matching values
Scroll down in the panel to **Show this section when…**.
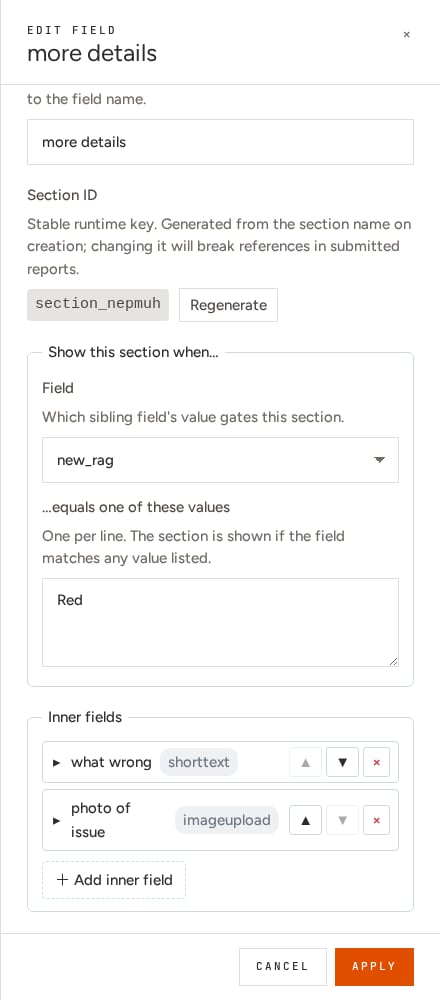 * **Field** — pick the sibling field whose answer should control visibility.
* **…equals one of these values** — list the value or values that reveal the section, one per line.
In the example above, the trigger field is a RAG field and the listed value is `Red`, so the section only appears if the field worker sets that rating to Red.
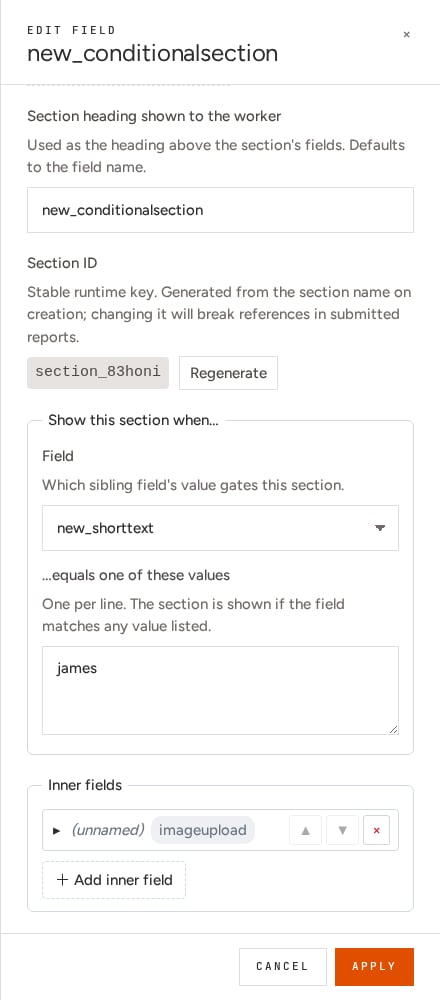
The same pattern works with any field type as the trigger. A short text field can gate a section on an exact answer:
* **Field** — pick the sibling field whose answer should control visibility.
* **…equals one of these values** — list the value or values that reveal the section, one per line.
In the example above, the trigger field is a RAG field and the listed value is `Red`, so the section only appears if the field worker sets that rating to Red.
The same pattern works with any field type as the trigger. A short text field can gate a section on an exact answer:
 And a combo box can gate a section on one of its option values:
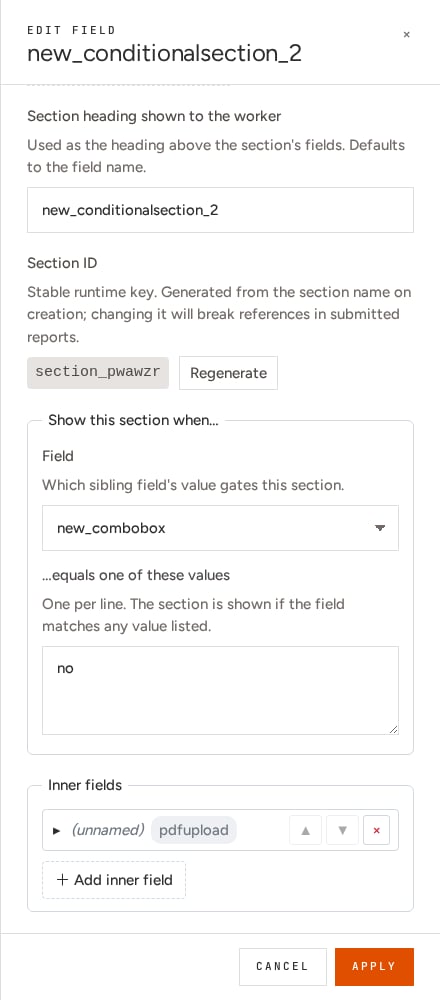 For a combo box or checkbox trigger, match the option's underlying value (for example `yes` / `no`), not necessarily its display label, if the two differ.
## Step 4: Add inner fields
Under **Inner fields**, click **+ Add inner field** for each field that should only appear once the condition is met. These work exactly like top-level fields — name them, pick a type, configure options — but they're nested inside the section rather than sitting loose on the form.
Click **Apply** to save the conditional section, then save the template as normal.
## Tips
* Matching is OR-based across multiple lines, not a range or comparison — there's no "greater than" or "not equal to," only "equals one of these listed values."
* If you change the trigger field or values later, it only affects future submissions. Reports submitted under the old rule keep their answers.
* Data entered into a conditional section's inner fields is preserved even if the section is later hidden by a change to the trigger's answer — it just doesn't display.
See the full list of field types available in report templates, including Conditional section.
See how these appear to the field worker filling in the form.
For a combo box or checkbox trigger, match the option's underlying value (for example `yes` / `no`), not necessarily its display label, if the two differ.
## Step 4: Add inner fields
Under **Inner fields**, click **+ Add inner field** for each field that should only appear once the condition is met. These work exactly like top-level fields — name them, pick a type, configure options — but they're nested inside the section rather than sitting loose on the form.
Click **Apply** to save the conditional section, then save the template as normal.
## Tips
* Matching is OR-based across multiple lines, not a range or comparison — there's no "greater than" or "not equal to," only "equals one of these listed values."
* If you change the trigger field or values later, it only affects future submissions. Reports submitted under the old rule keep their answers.
* Data entered into a conditional section's inner fields is preserved even if the section is later hidden by a change to the trigger's answer — it just doesn't display.
See the full list of field types available in report templates, including Conditional section.
See how these appear to the field worker filling in the form.