> ## Documentation Index
> Fetch the complete documentation index at: https://docs.fieldpal.ai/llms.txt
> Use this file to discover all available pages before exploring further.
# Creating a report template
> How to build a custom form template in the FieldPal dashboard.
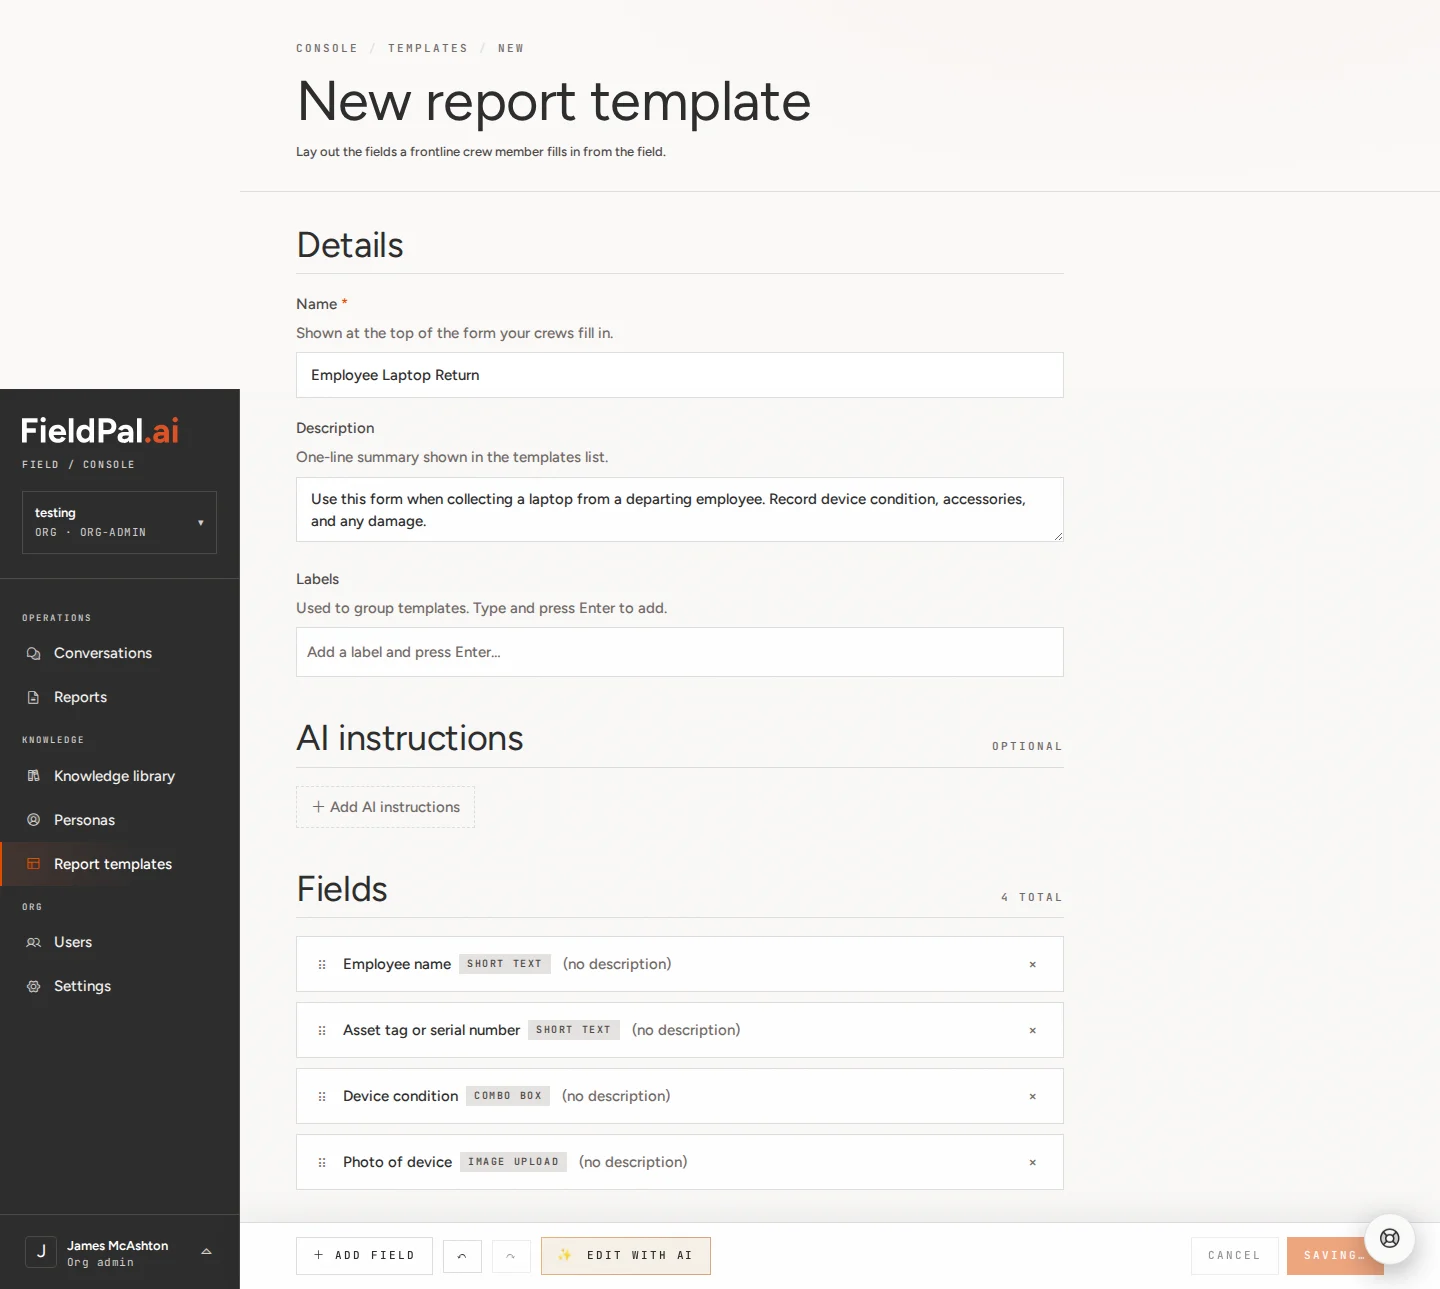
Report templates define the fields that get filled in when a field worker completes a job. This guide walks you through creating a template from scratch. We will use an **Employee Laptop Return** form as the example: it collects the employee's name, the device's asset tag, a condition rating, and a photo.
The same steps apply to any template you want to build.
## Before you start
You will need a FieldPal account with the **Org Admin** role (or equivalent permission to manage templates). Log in to the dashboard at [dashboard.fieldpal.ai](https://dashboard.fieldpal.ai).
## Step 1: Go to Report Templates
In the left-hand navigation, click **Report templates**.
 ## Step 2: Create a new template
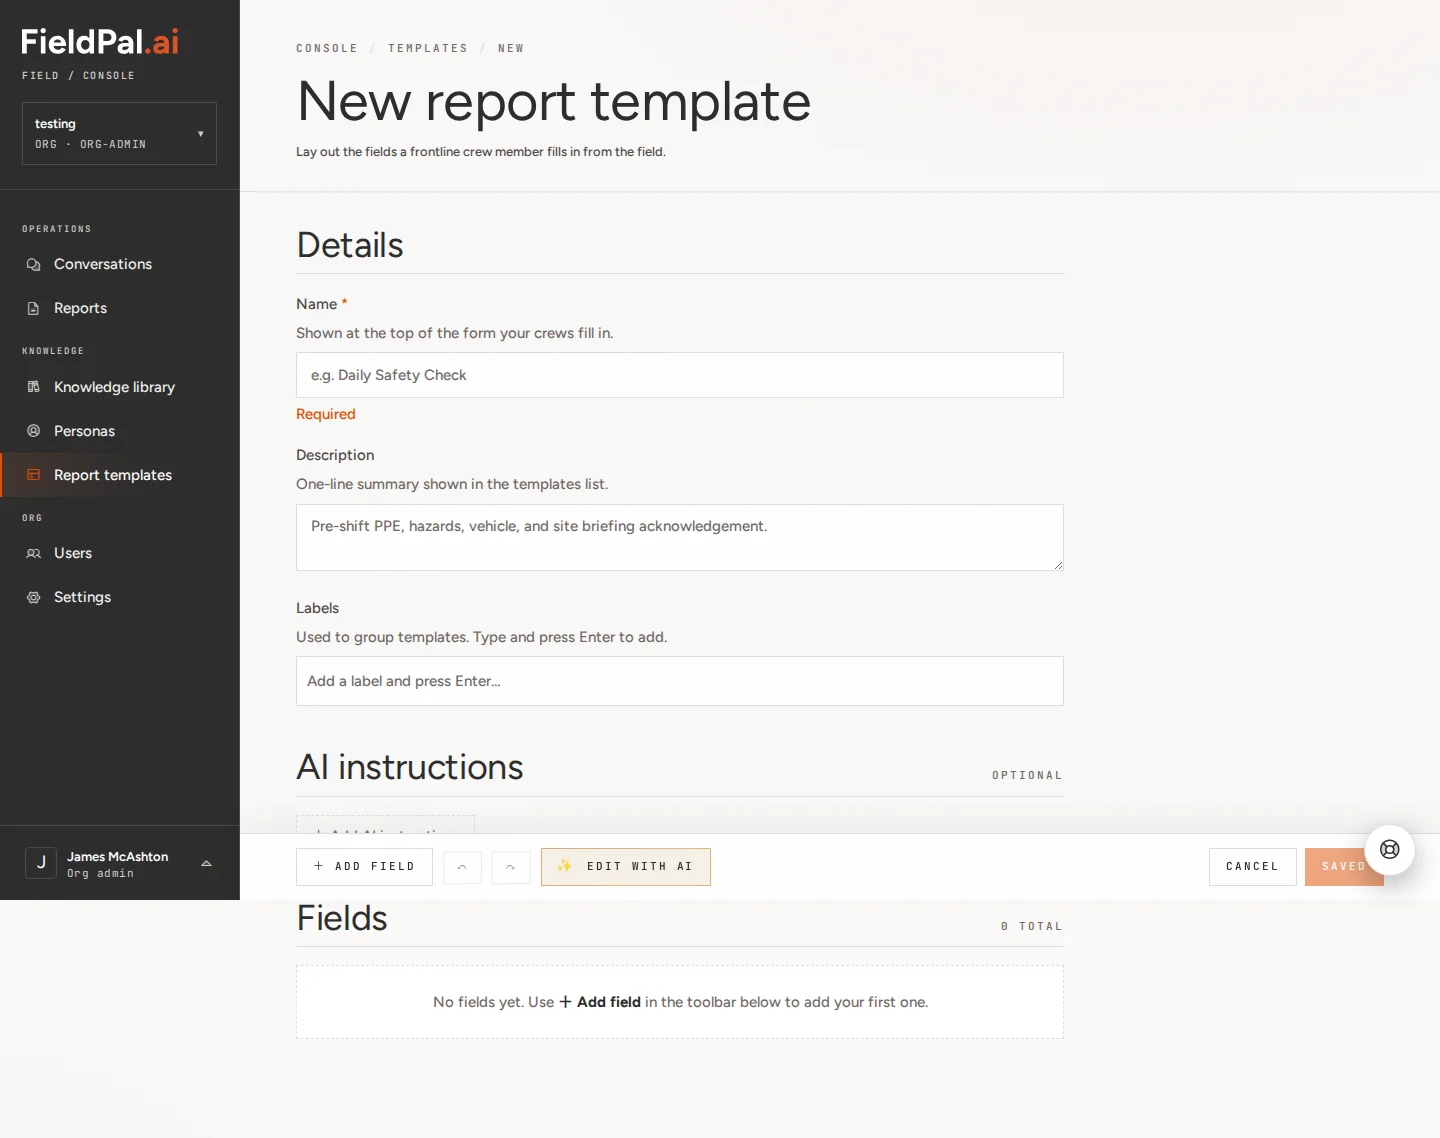
On the Report Templates page, click the **+ New template** button in the top right. This opens a blank template editor.
## Step 3: Name and describe the template
At the top of the editor you will see two fields:
* **Name**: what your team sees when choosing a form. Use something clear and specific, e.g. `Employee Laptop Return`.
* **Description**: a one-line summary shown in the template list, e.g. `Use this form when collecting a laptop from a departing employee. Record device condition, accessories, and any damage.`
## Step 2: Create a new template
On the Report Templates page, click the **+ New template** button in the top right. This opens a blank template editor.
## Step 3: Name and describe the template
At the top of the editor you will see two fields:
* **Name**: what your team sees when choosing a form. Use something clear and specific, e.g. `Employee Laptop Return`.
* **Description**: a one-line summary shown in the template list, e.g. `Use this form when collecting a laptop from a departing employee. Record device condition, accessories, and any damage.`
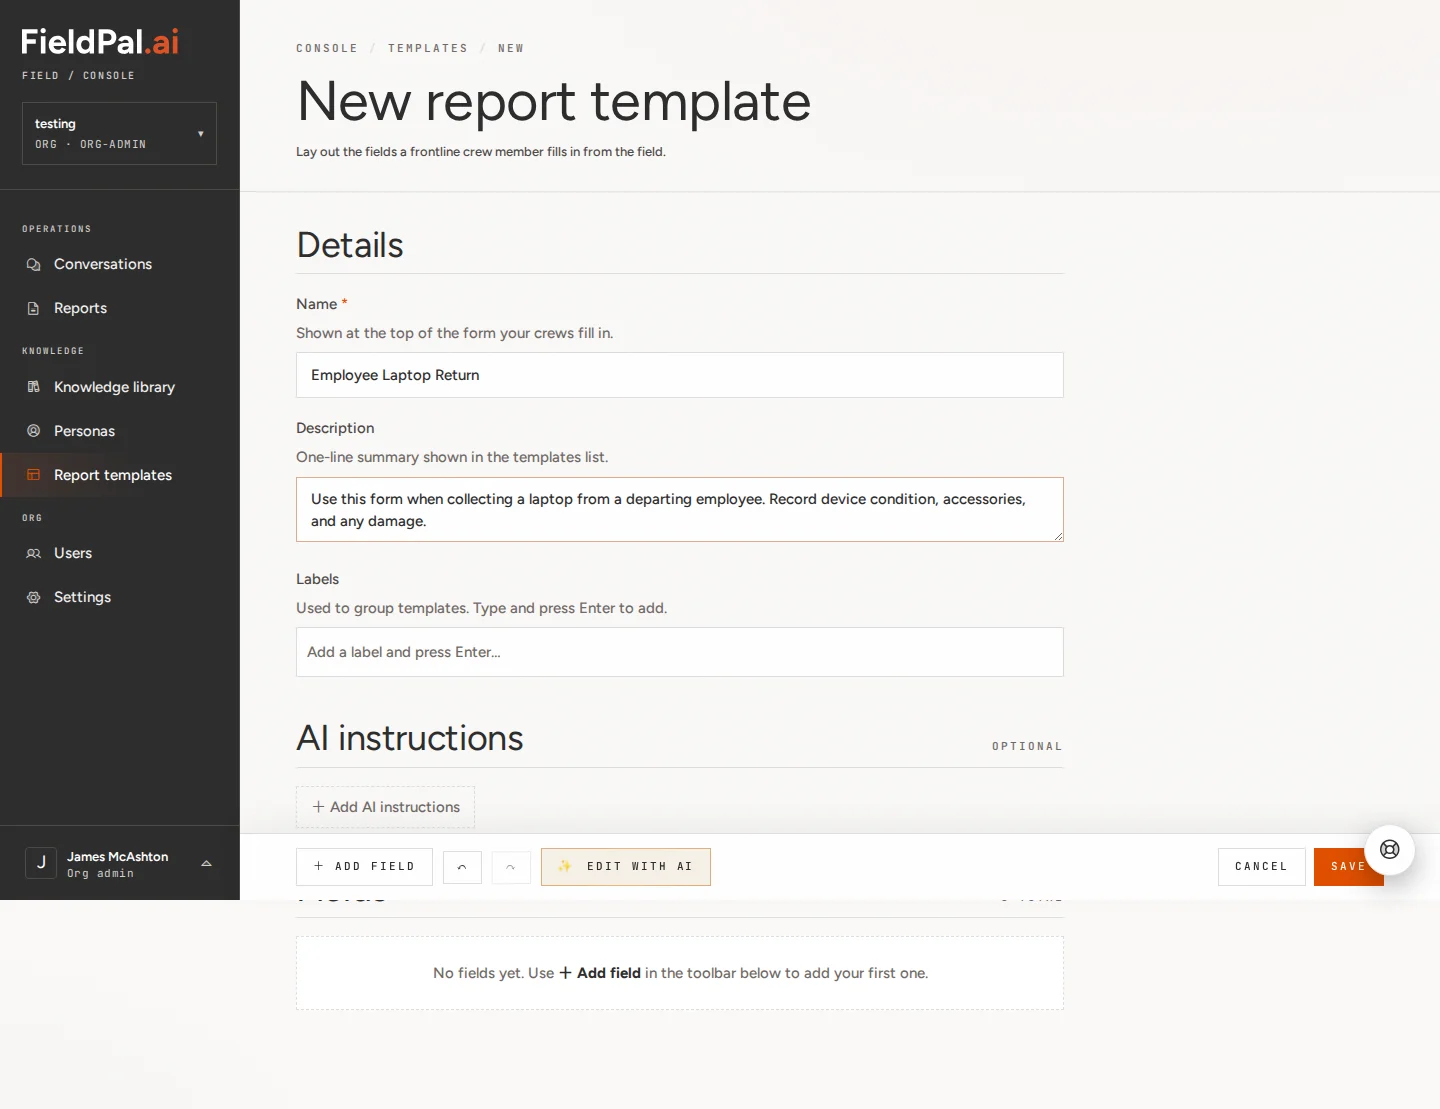 The name and description do not appear inside the form itself. They are just for identifying the template in the dashboard and app.
## Step 4: Add a Short text field (Employee name)
Scroll down to the **Fields** section and click **+ Add field** in the toolbar at the bottom. A menu appears listing all available field types.
The name and description do not appear inside the form itself. They are just for identifying the template in the dashboard and app.
## Step 4: Add a Short text field (Employee name)
Scroll down to the **Fields** section and click **+ Add field** in the toolbar at the bottom. A menu appears listing all available field types.
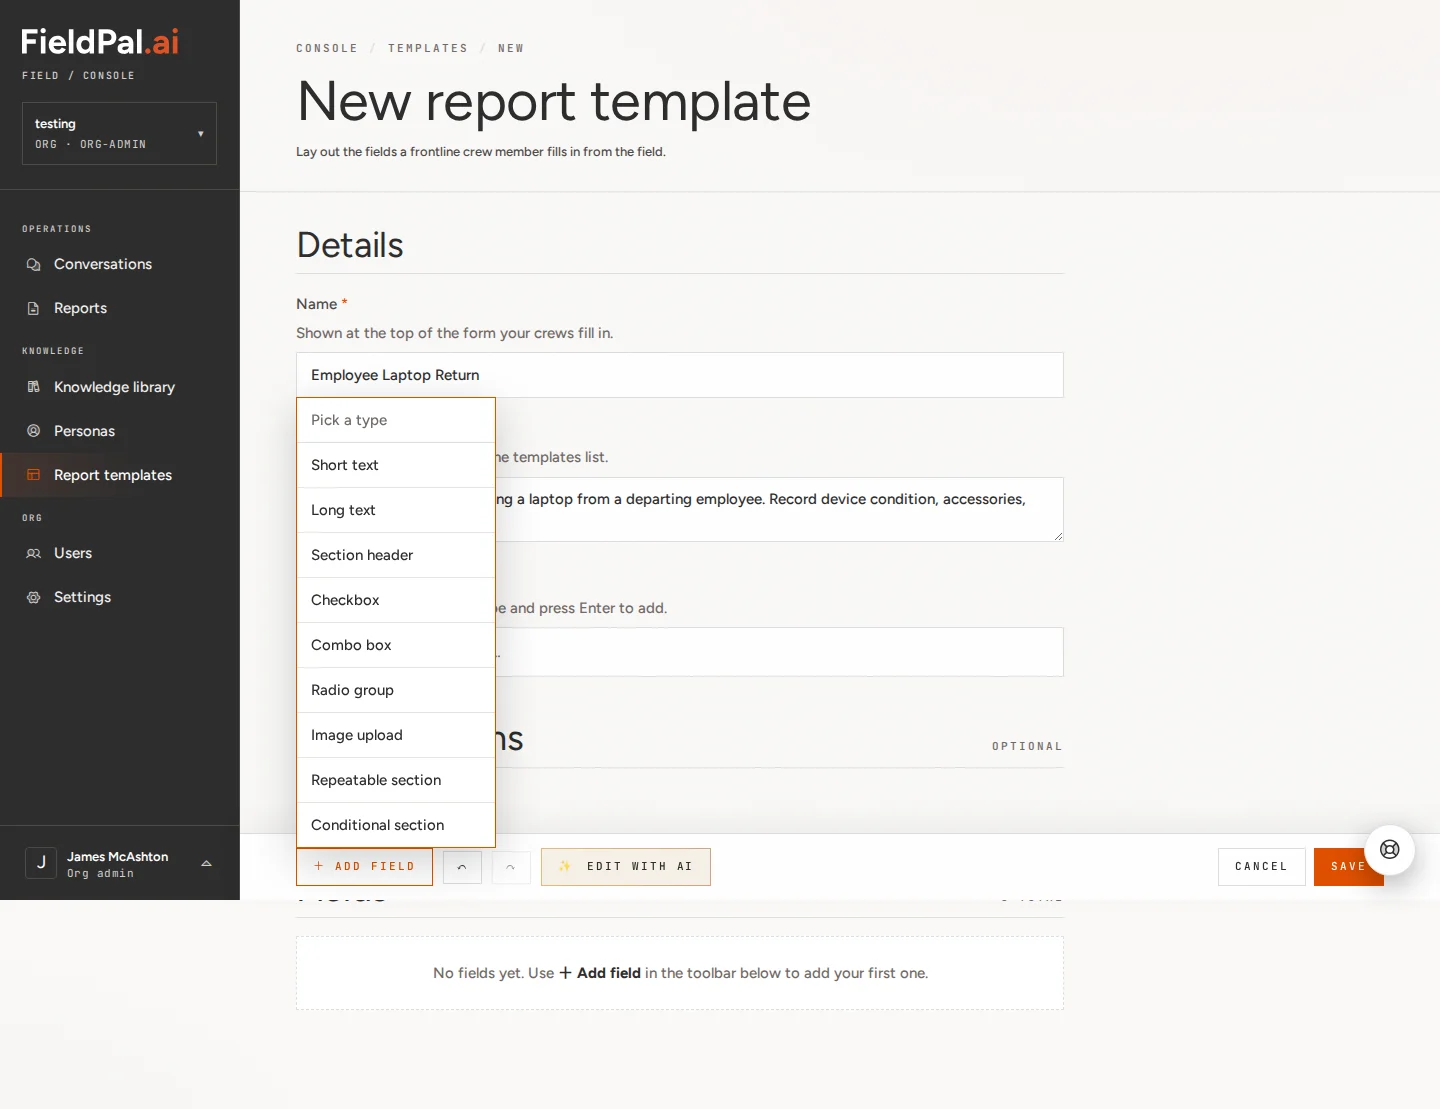 | Type | What it does |
| ------------------- | -------------------------------------------------- |
| Short text | A single line of free text |
| Long text | A multi-line text box |
| Section header | A heading that divides the form into sections |
| Checkbox | A yes/no tick box |
| Combo box | A dropdown with pre-set options |
| Radio group | A list of options where only one can be selected |
| Image upload | Allows the user to take or attach a photo |
| Repeatable section | A group of fields that can be added multiple times |
| Conditional section | Fields that only appear if a condition is met |
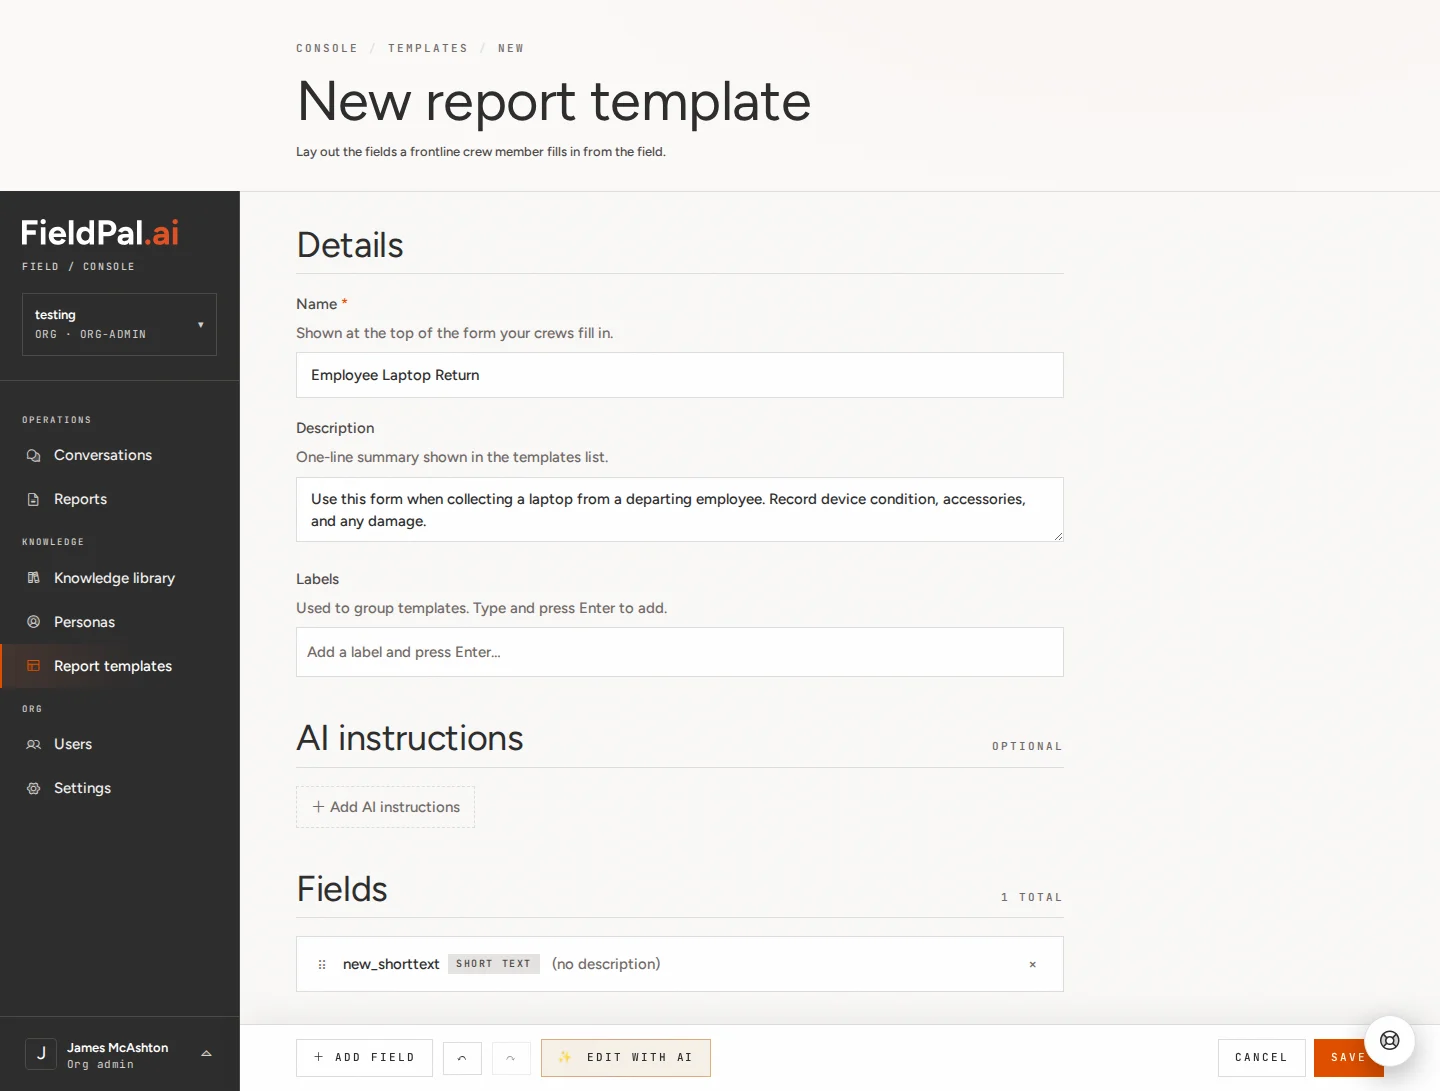
Click **Short text**. A new field appears in the list with a default name.
| Type | What it does |
| ------------------- | -------------------------------------------------- |
| Short text | A single line of free text |
| Long text | A multi-line text box |
| Section header | A heading that divides the form into sections |
| Checkbox | A yes/no tick box |
| Combo box | A dropdown with pre-set options |
| Radio group | A list of options where only one can be selected |
| Image upload | Allows the user to take or attach a photo |
| Repeatable section | A group of fields that can be added multiple times |
| Conditional section | Fields that only appear if a condition is met |
Click **Short text**. A new field appears in the list with a default name.
 ## Step 5: Name the field
Click anywhere on the field row to open the **Edit field** panel on the right.
## Step 5: Name the field
Click anywhere on the field row to open the **Edit field** panel on the right.
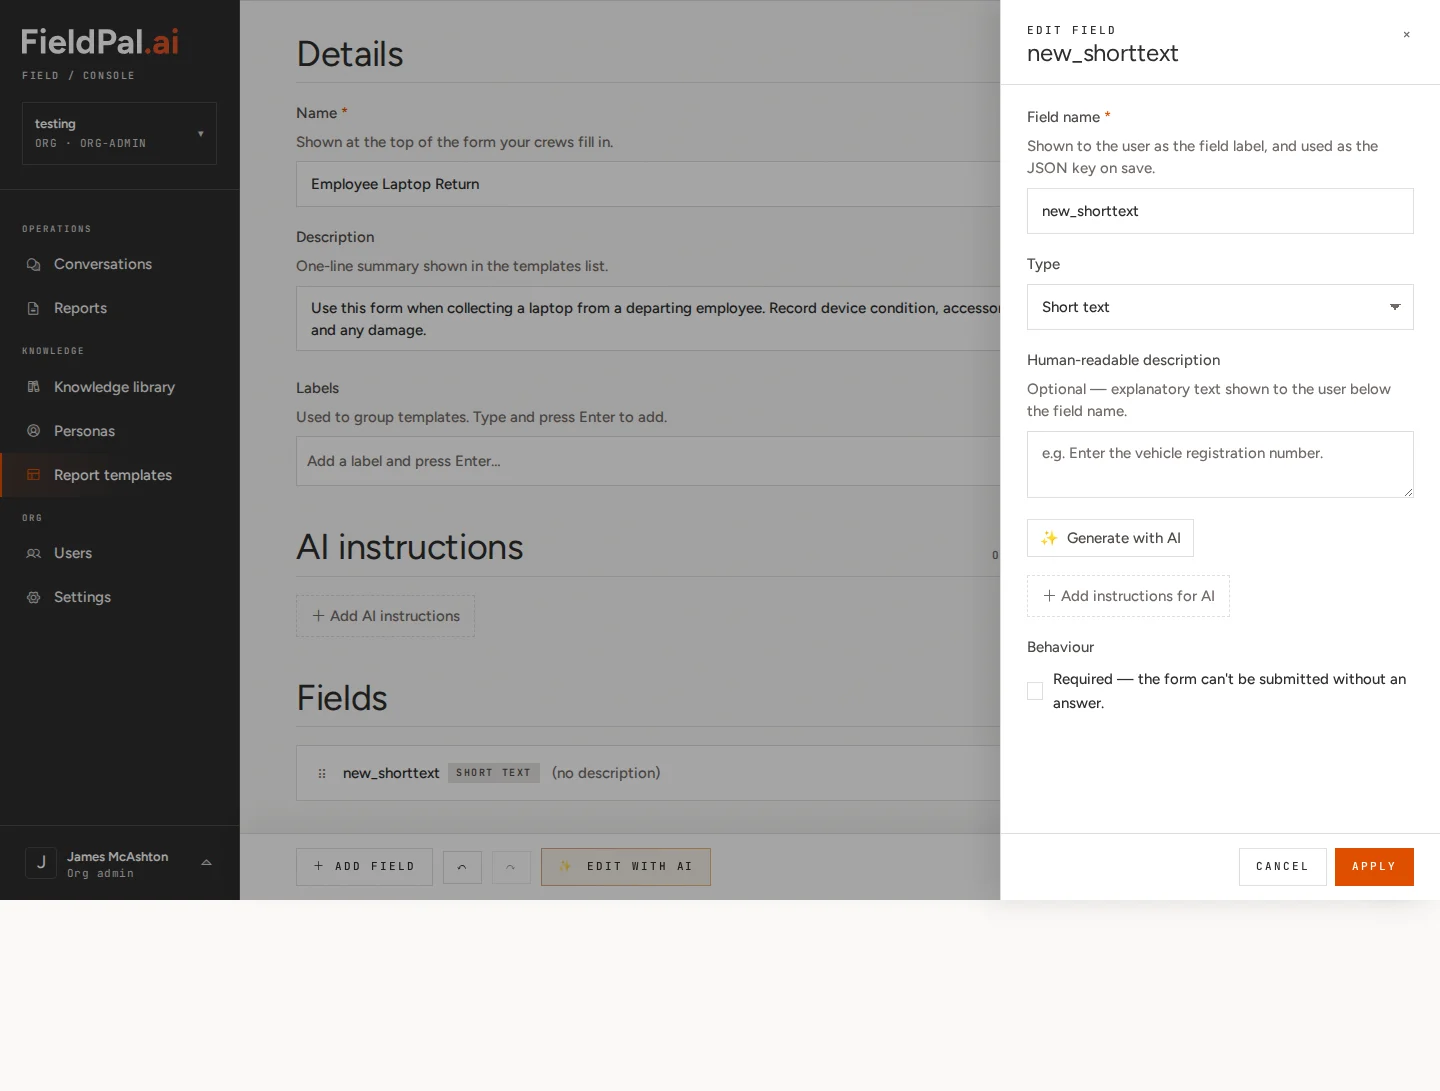 In the **Field name** box, clear the default text and type: `Employee name`
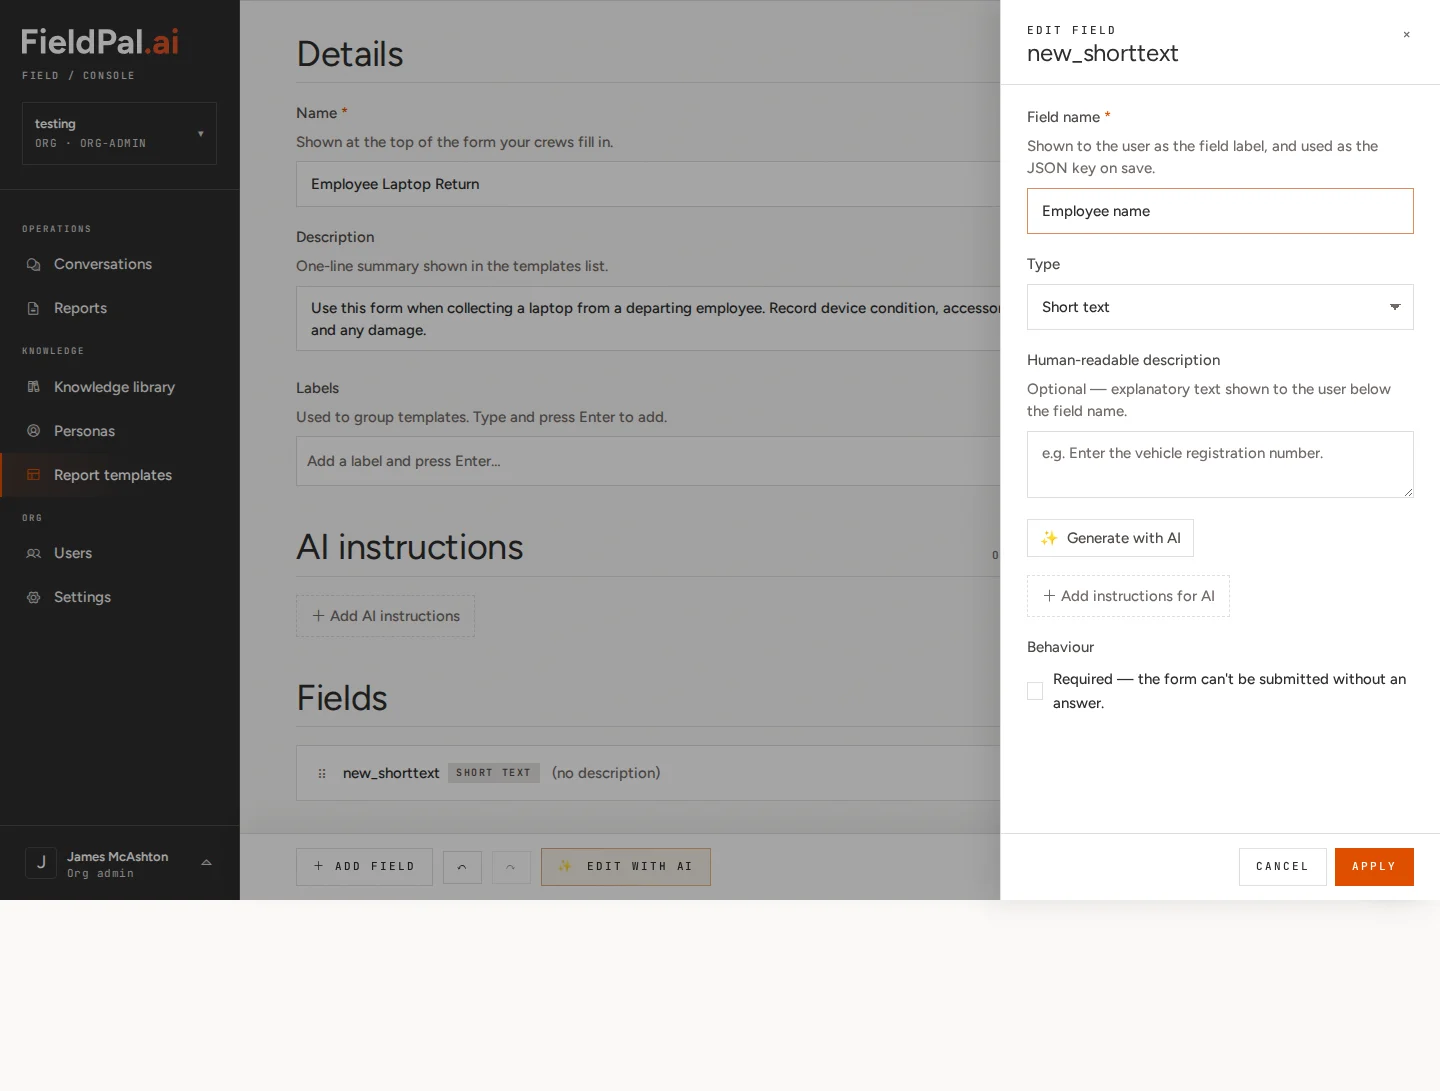 The field name is the question label that the person filling in the form will see. Keep it short and plain.
Click **Apply** at the bottom of the panel.
The field name is the question label that the person filling in the form will see. Keep it short and plain.
Click **Apply** at the bottom of the panel.
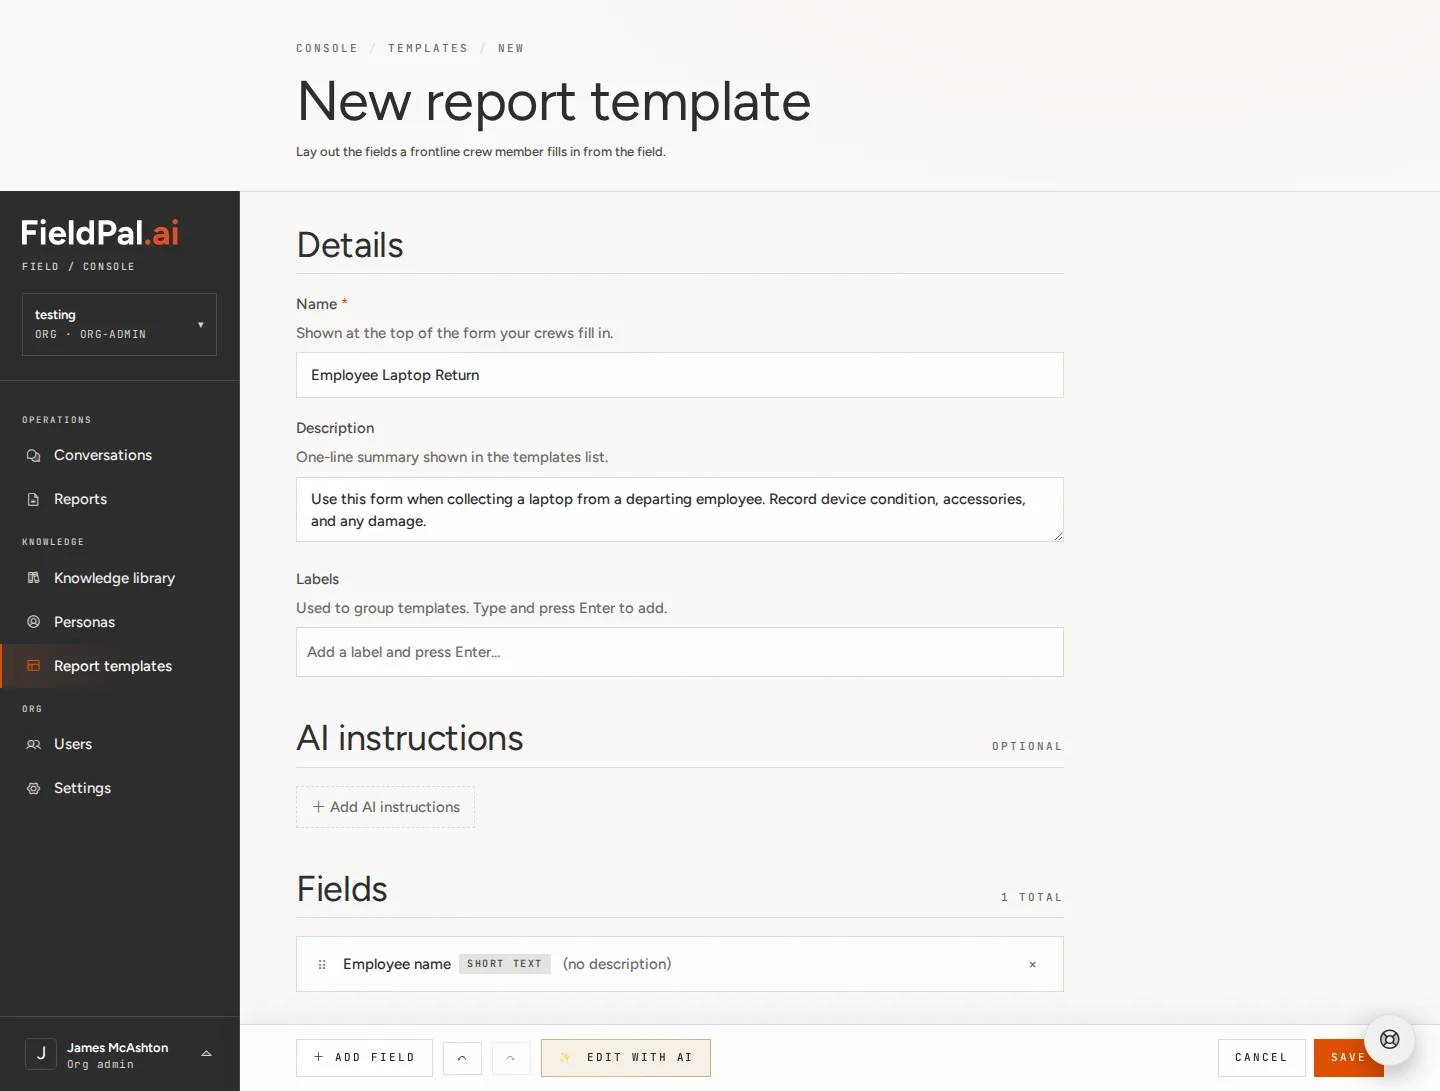 ## Step 6: Add a second Short text field (Asset tag)
Click **+ Add field** again and choose **Short text**.
## Step 6: Add a second Short text field (Asset tag)
Click **+ Add field** again and choose **Short text**.
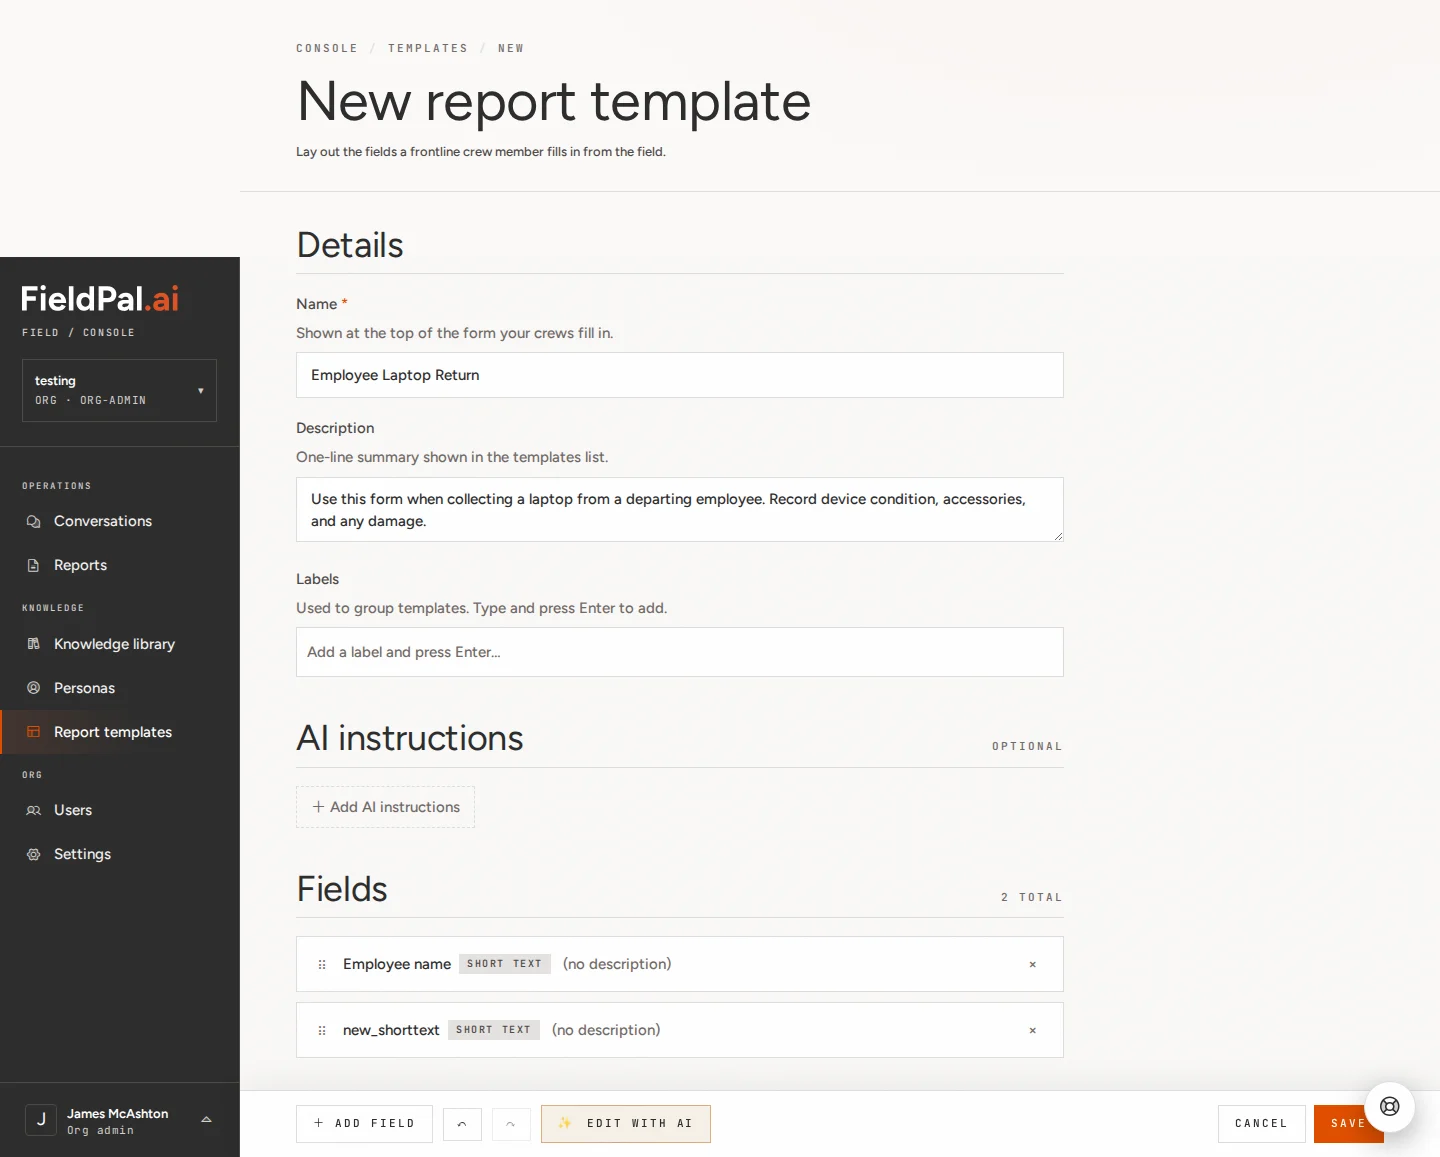 Click the new field row to open the editor. Set the field name to: `Asset tag or serial number`
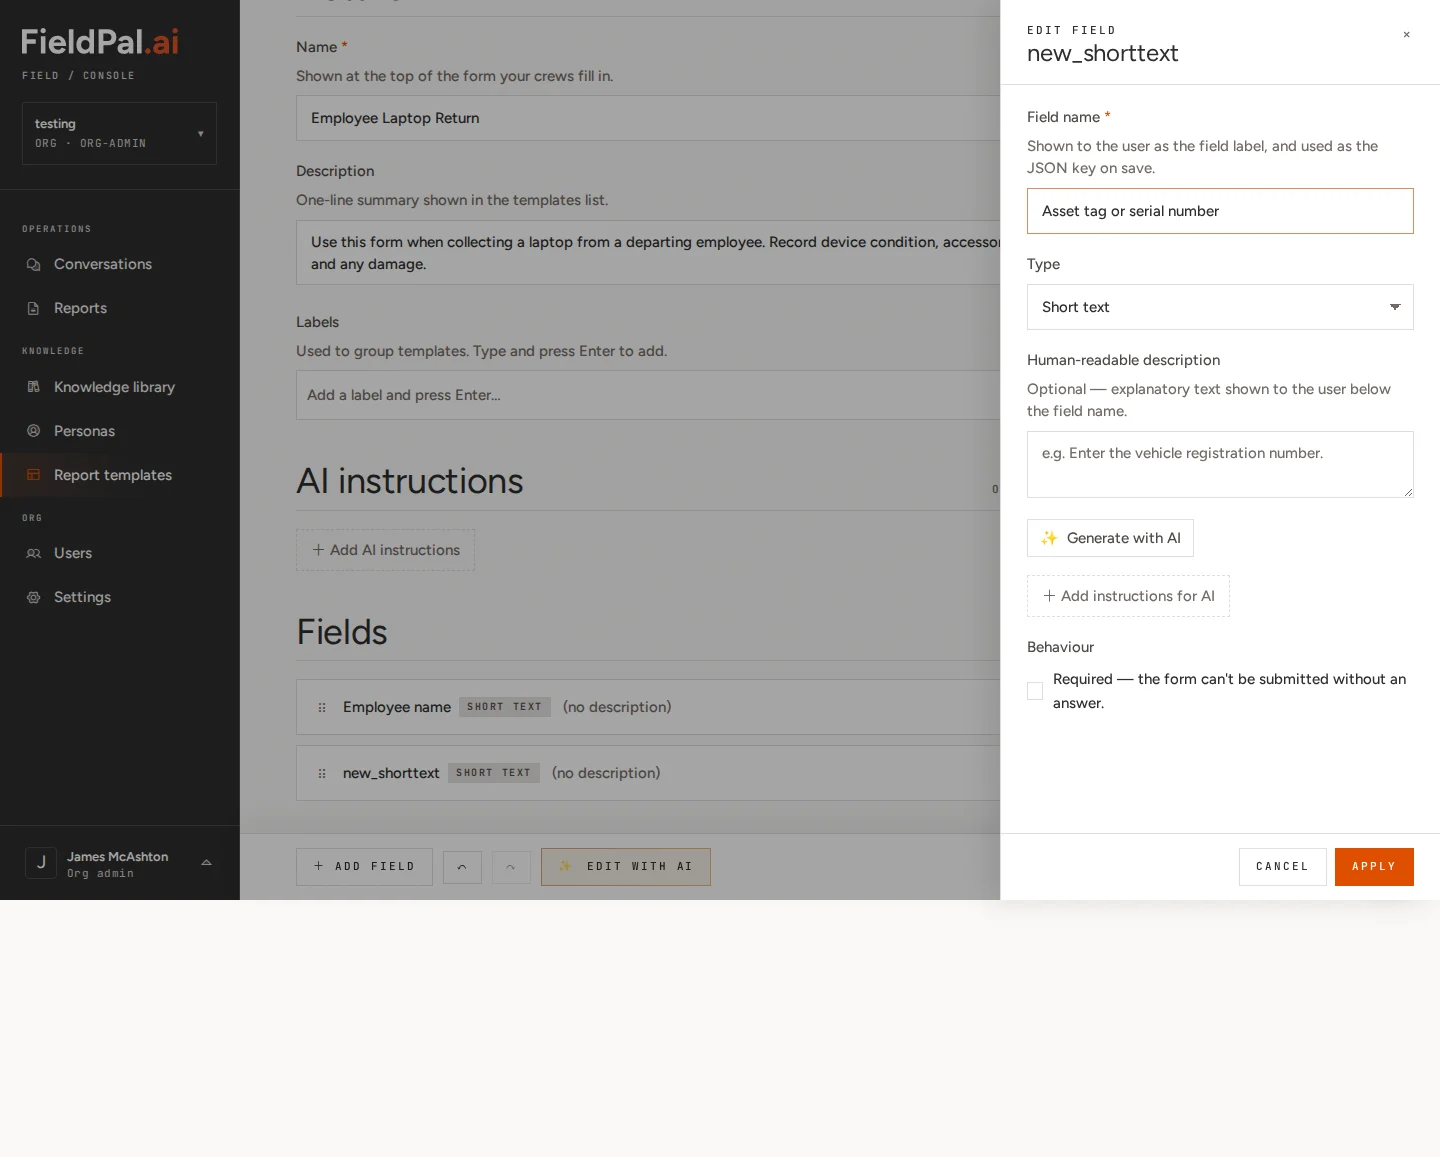 Click **Apply**.
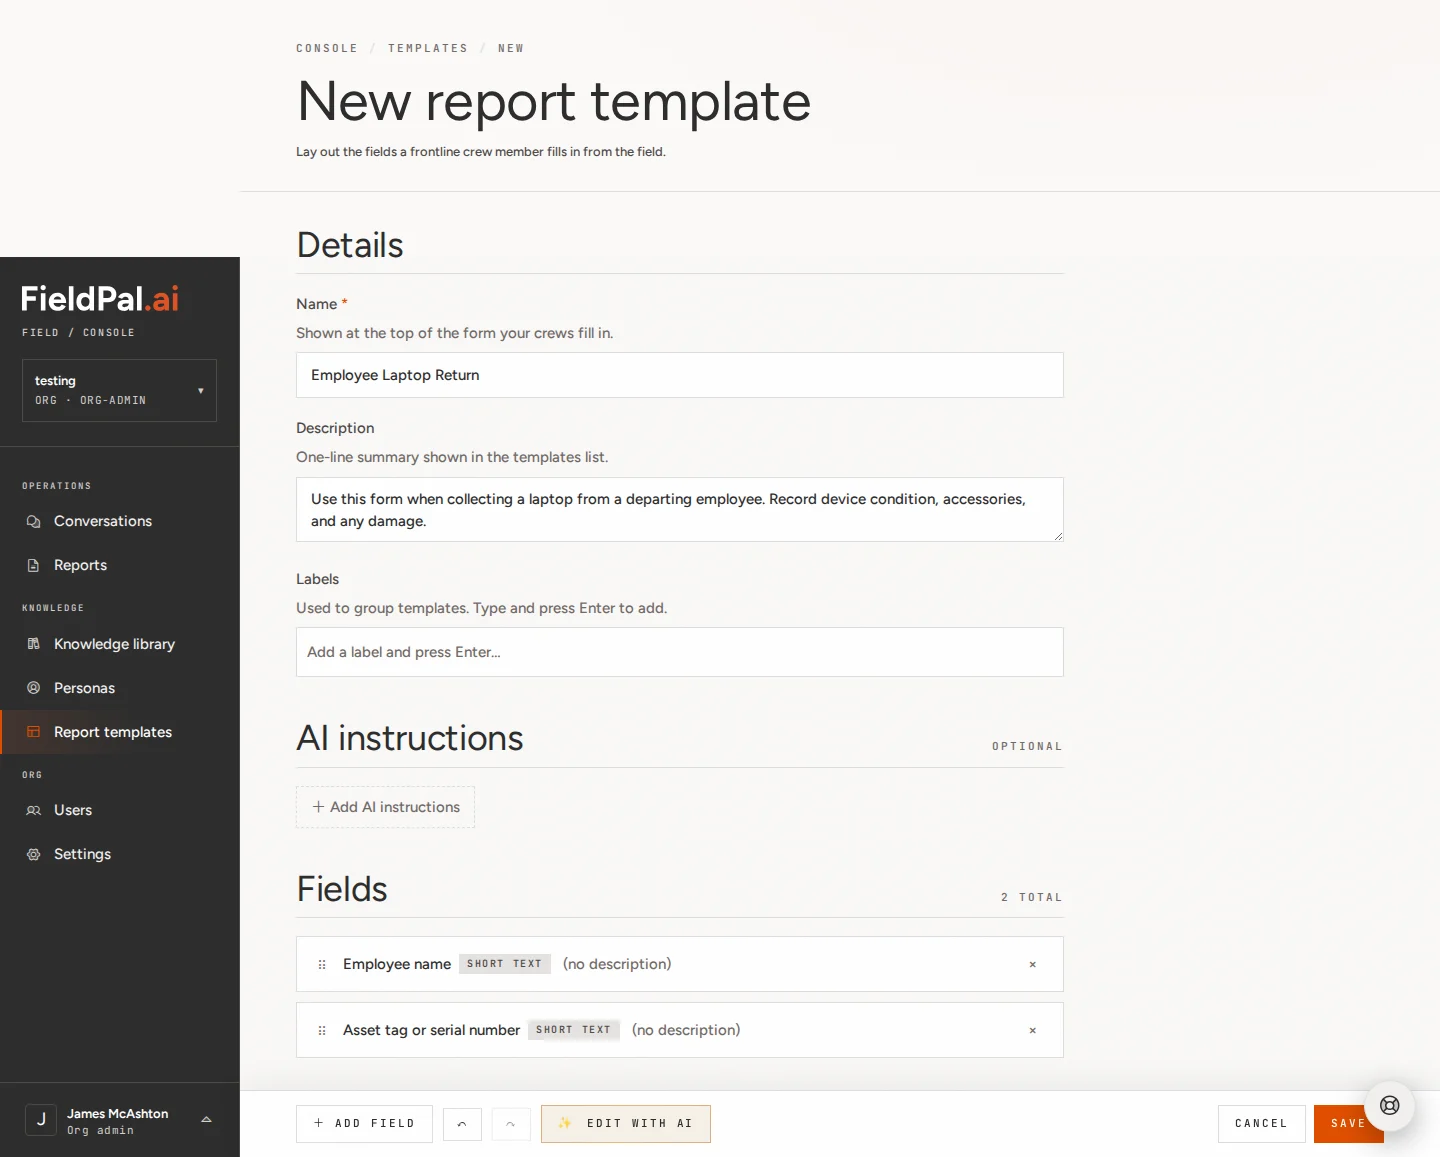 ## Step 7: Add a Combo box field (Device condition)
Click **+ Add field** and choose **Combo box**.
## Step 7: Add a Combo box field (Device condition)
Click **+ Add field** and choose **Combo box**.
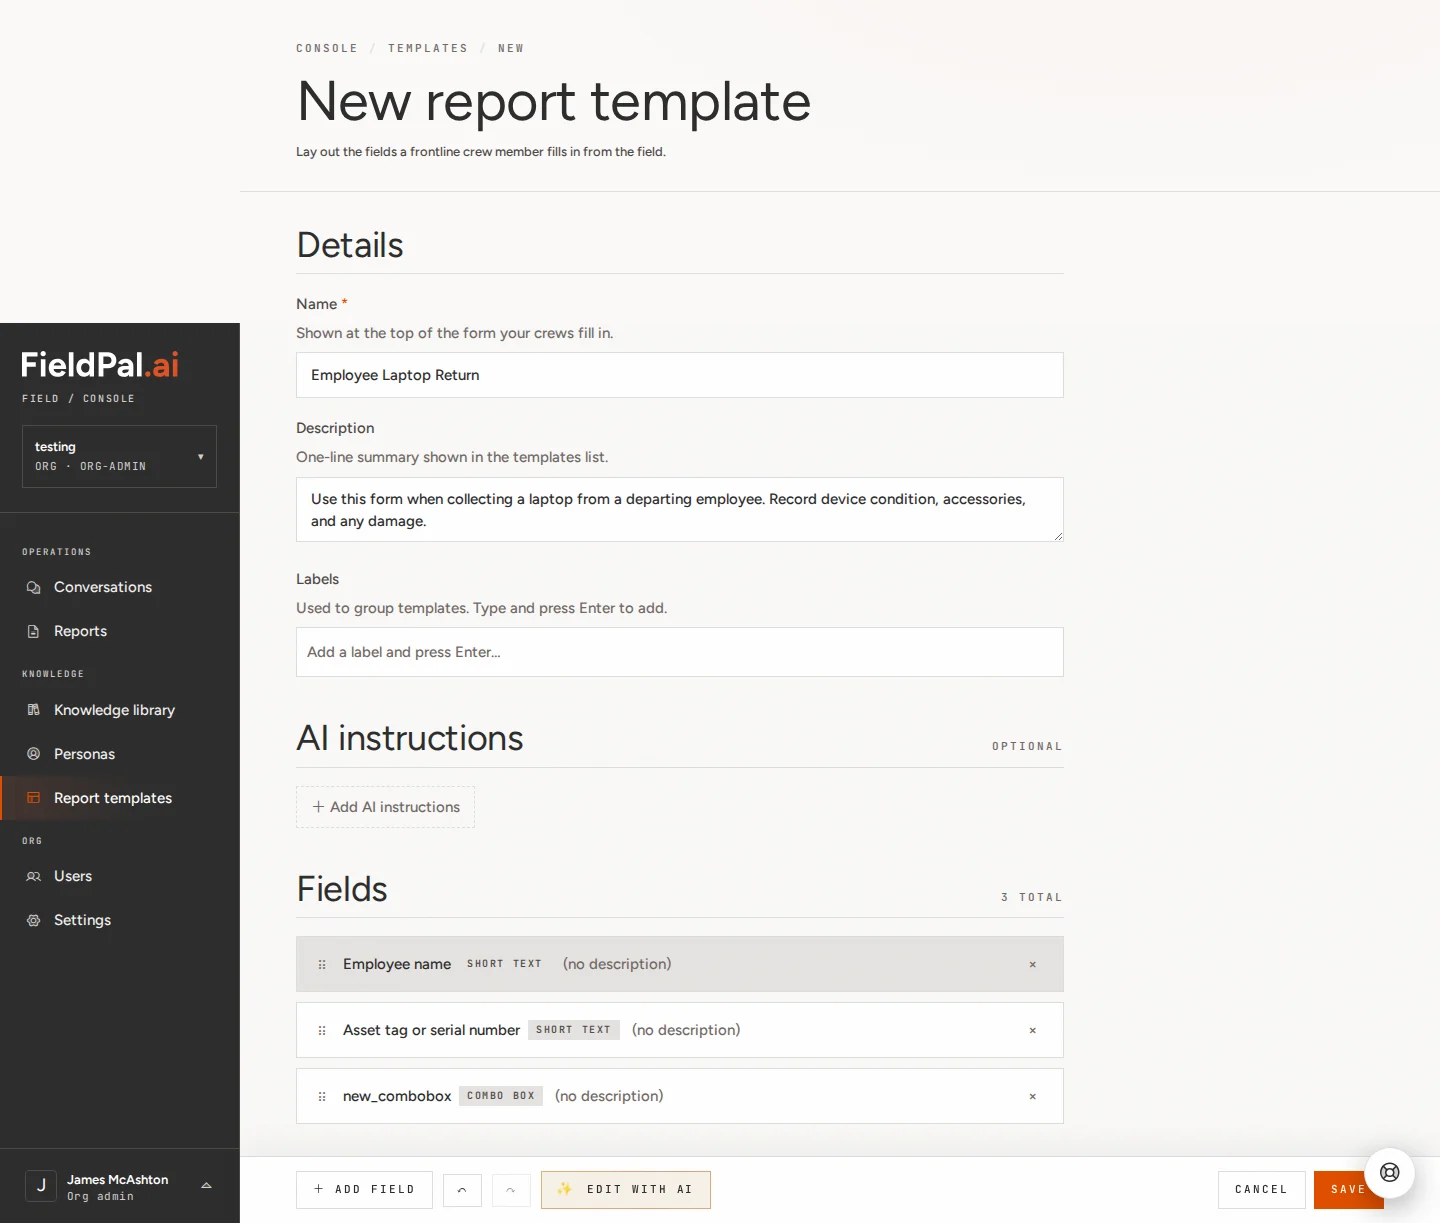 Click the new field to open the editor.
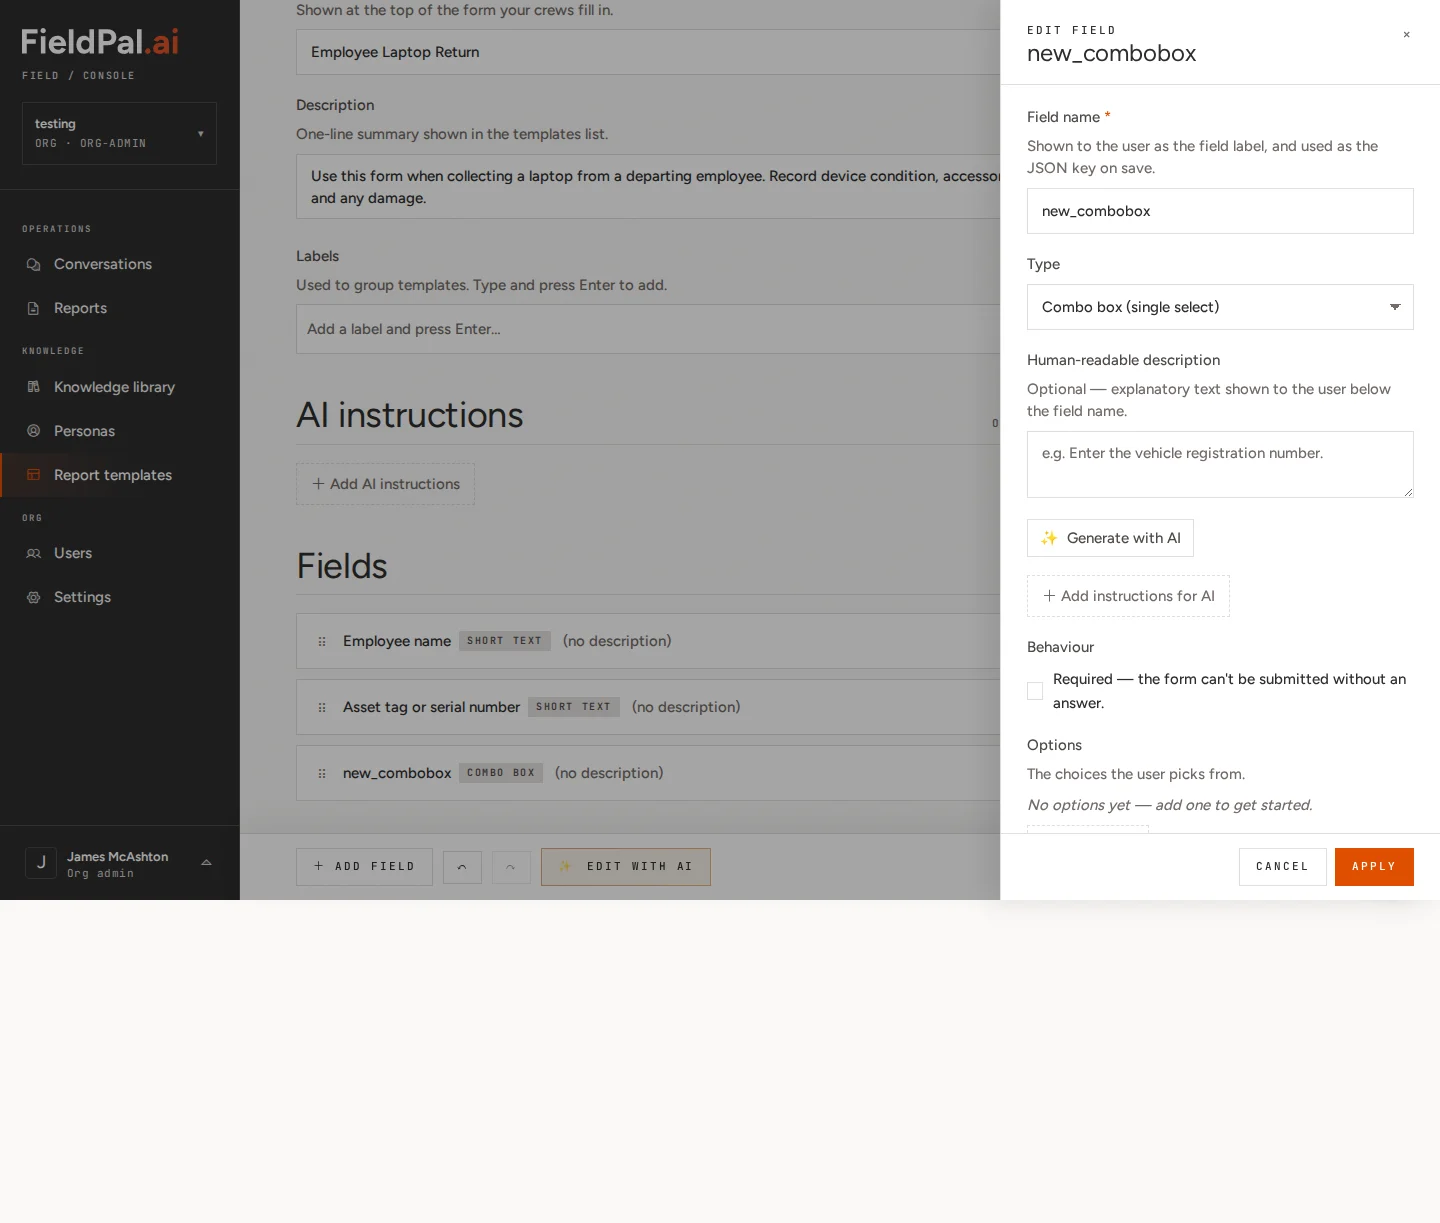 Set the field name to: `Device condition`
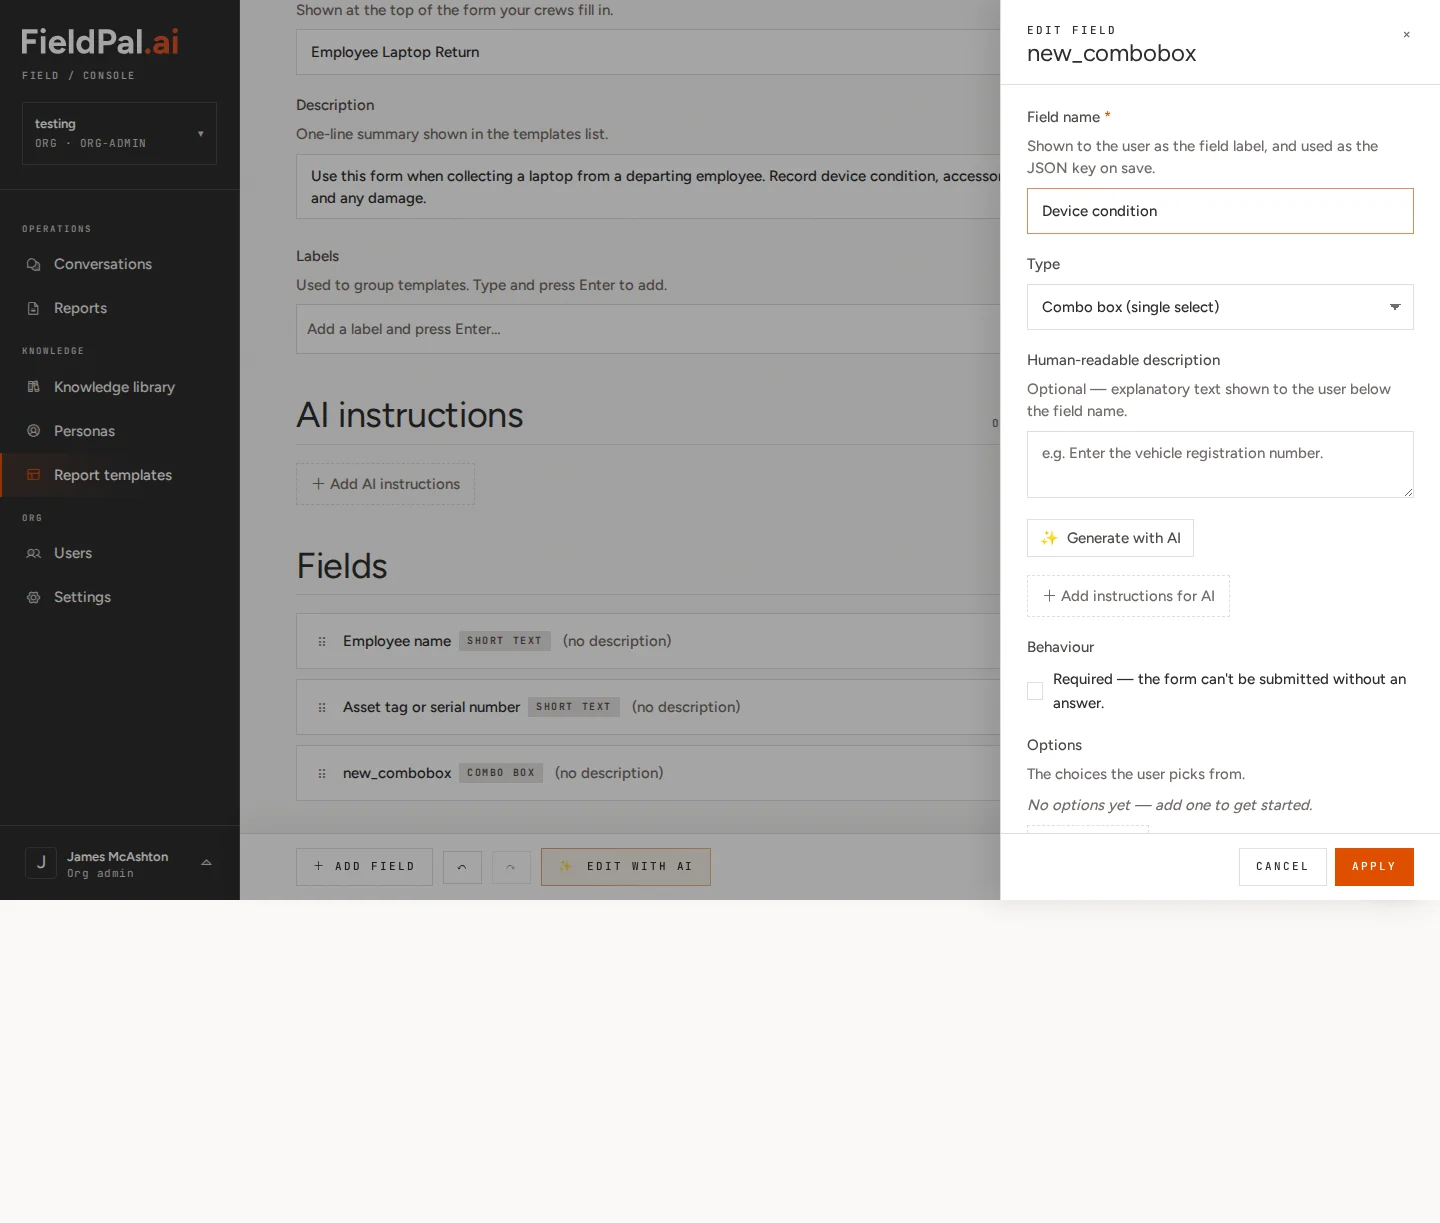 Scroll down in the editor to the **Options** section. Click **+ Add option** once for each choice, and type:
* `Good – no visible damage`
* `Fair – minor wear or scuffs`
* `Damaged – visible defects`
Scroll down in the editor to the **Options** section. Click **+ Add option** once for each choice, and type:
* `Good – no visible damage`
* `Fair – minor wear or scuffs`
* `Damaged – visible defects`
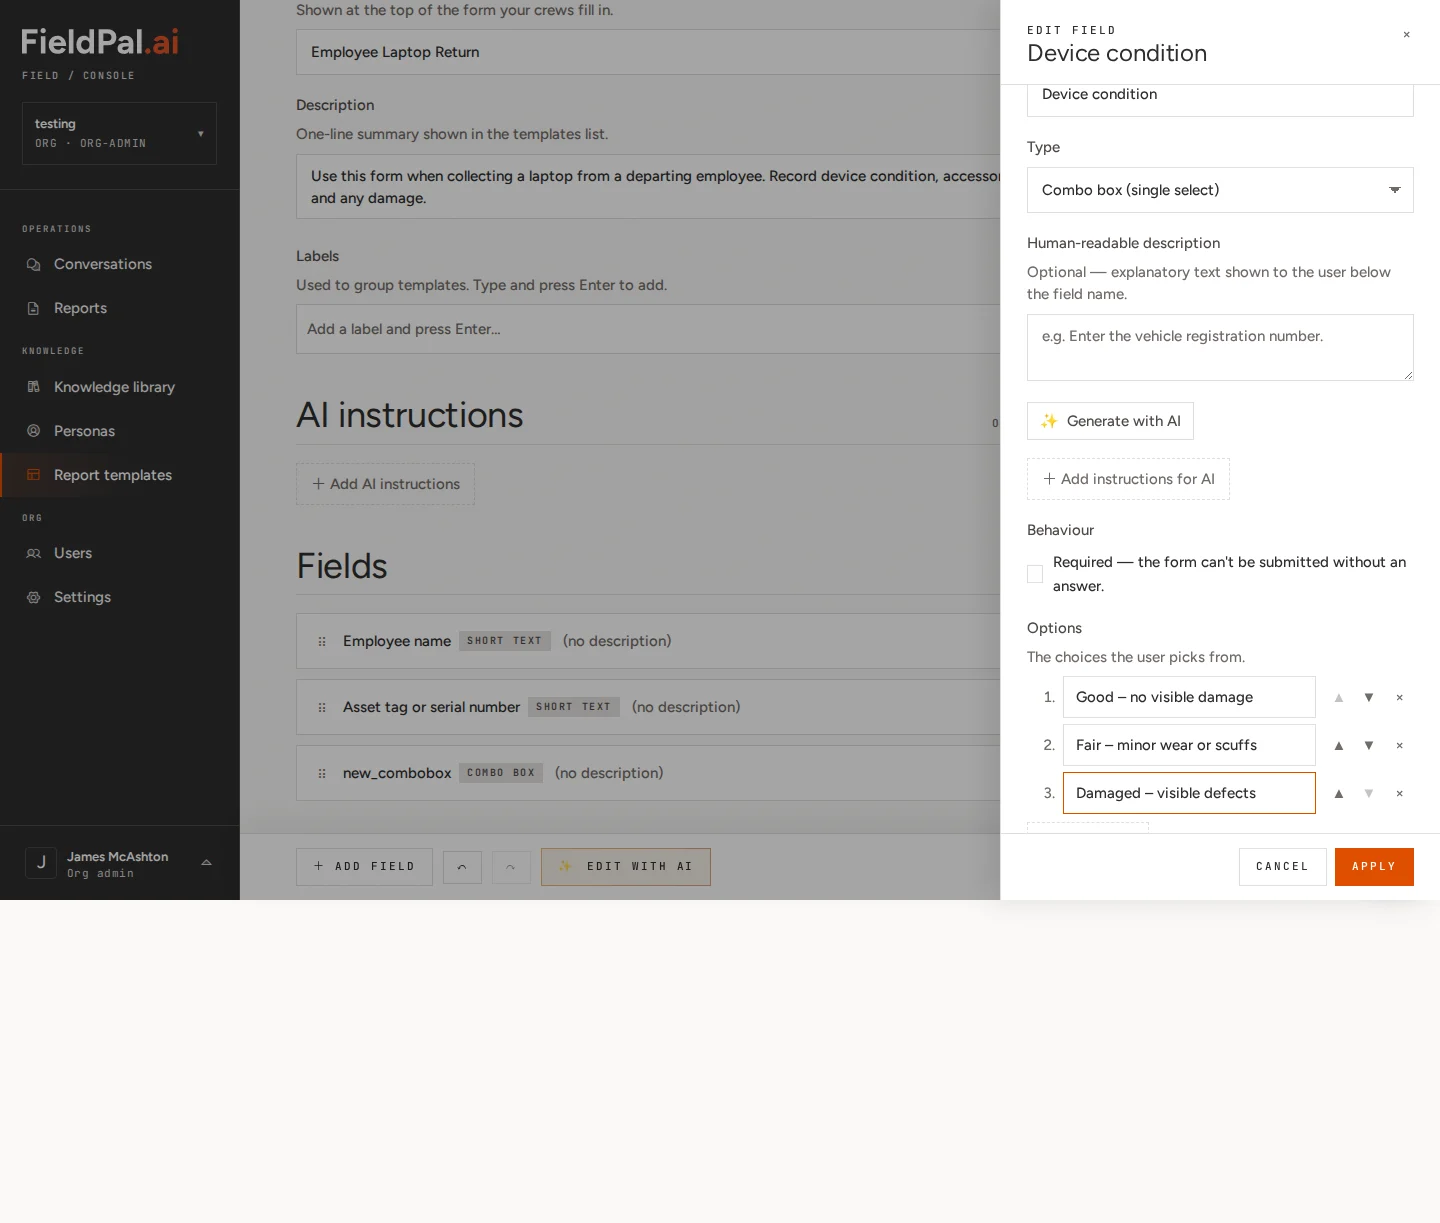 Click **Apply** when all three options are entered.
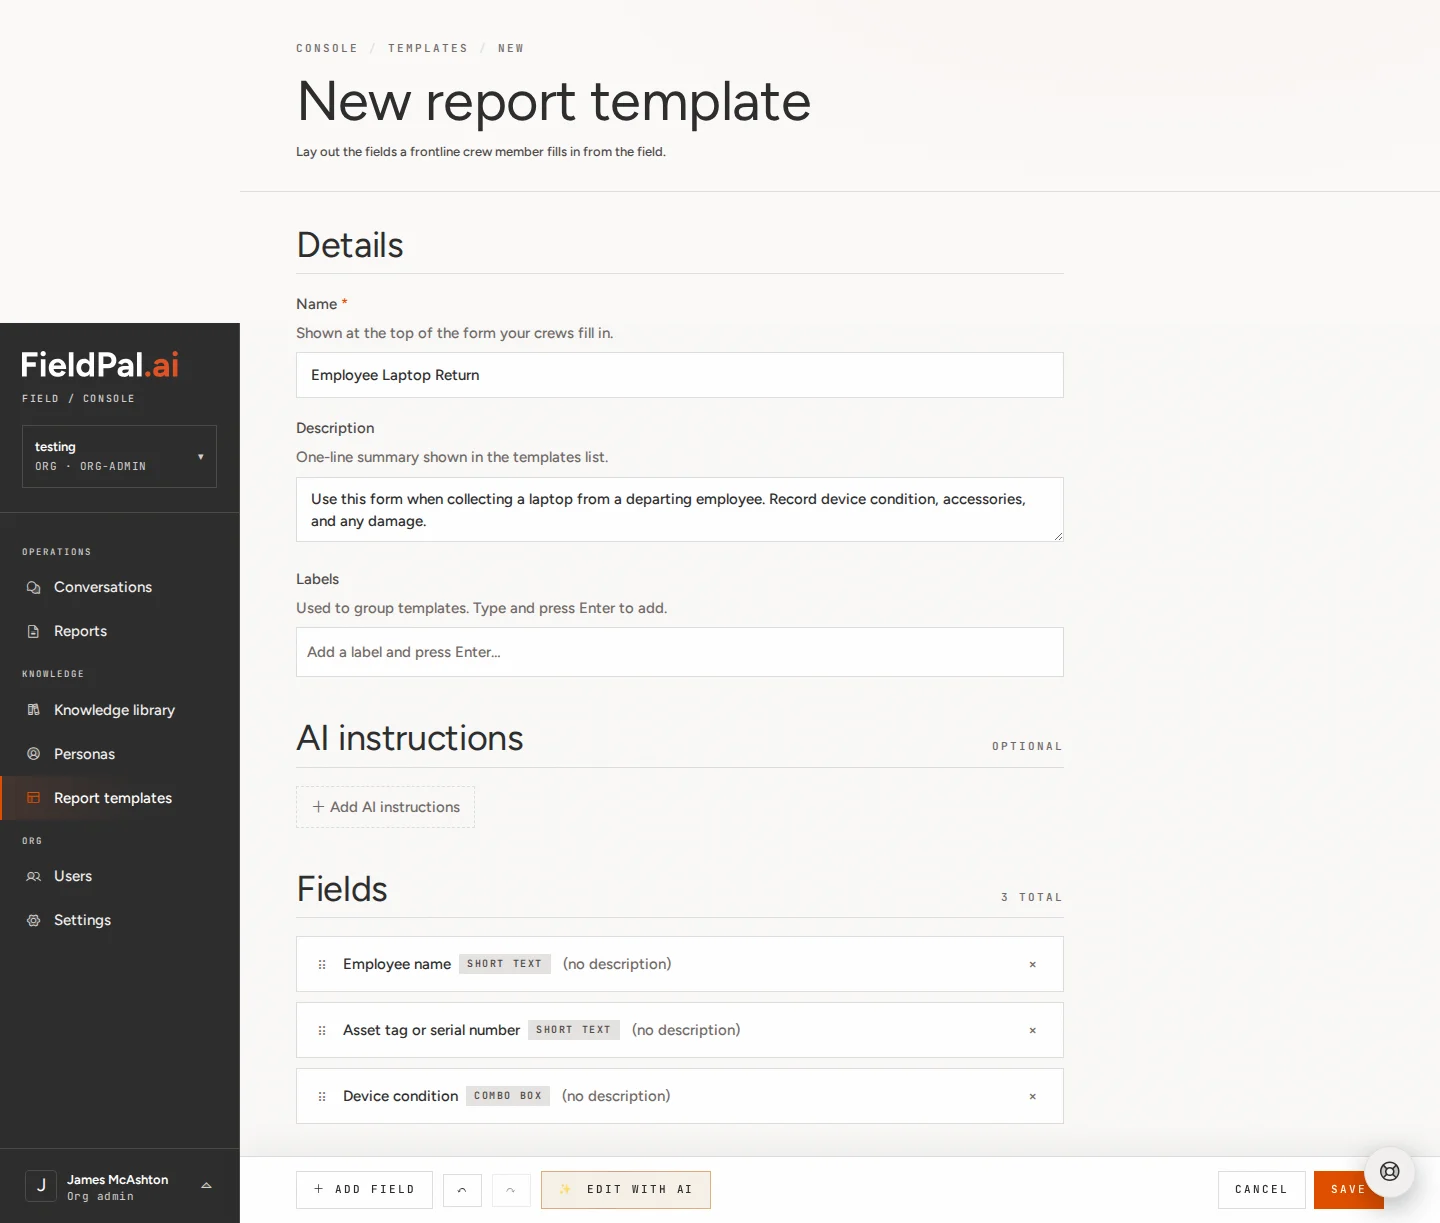 ## Step 8: Add an Image upload field (Photo of device)
Click **+ Add field** and choose **Image upload**.
## Step 8: Add an Image upload field (Photo of device)
Click **+ Add field** and choose **Image upload**.
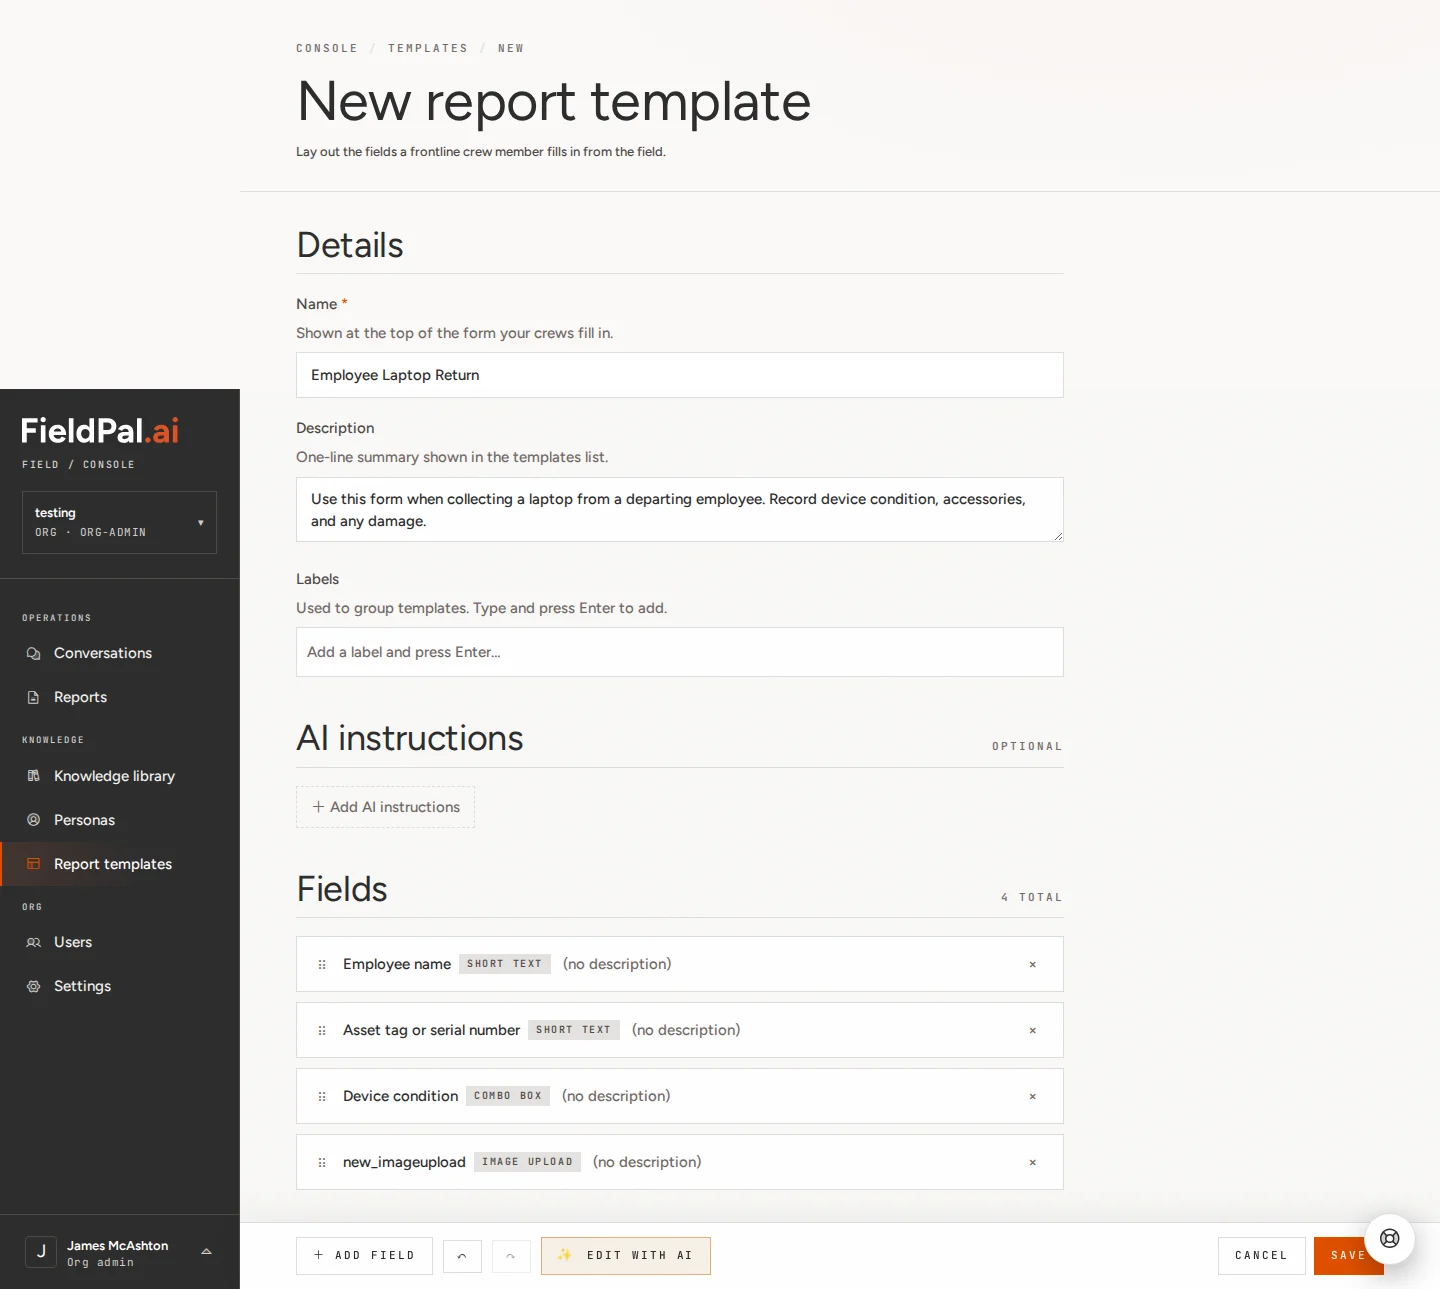 Click the field to open the editor.
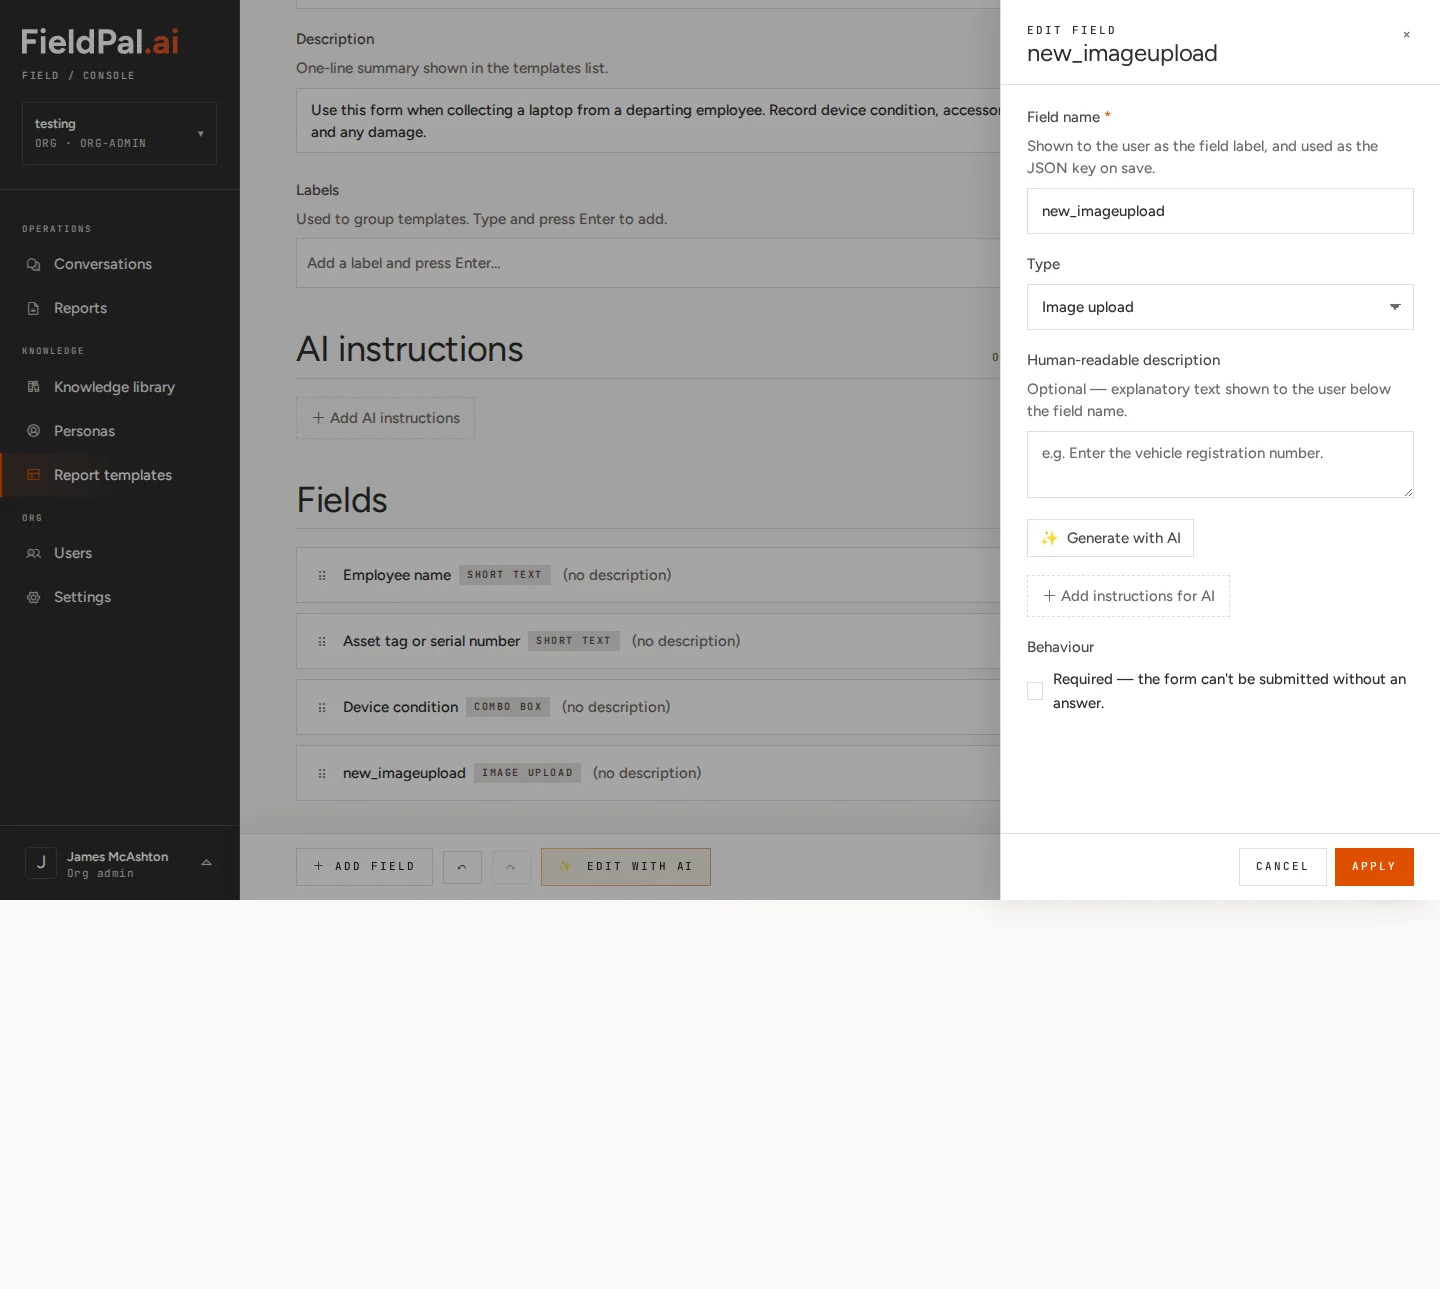 Set the field name to: `Photo of device`
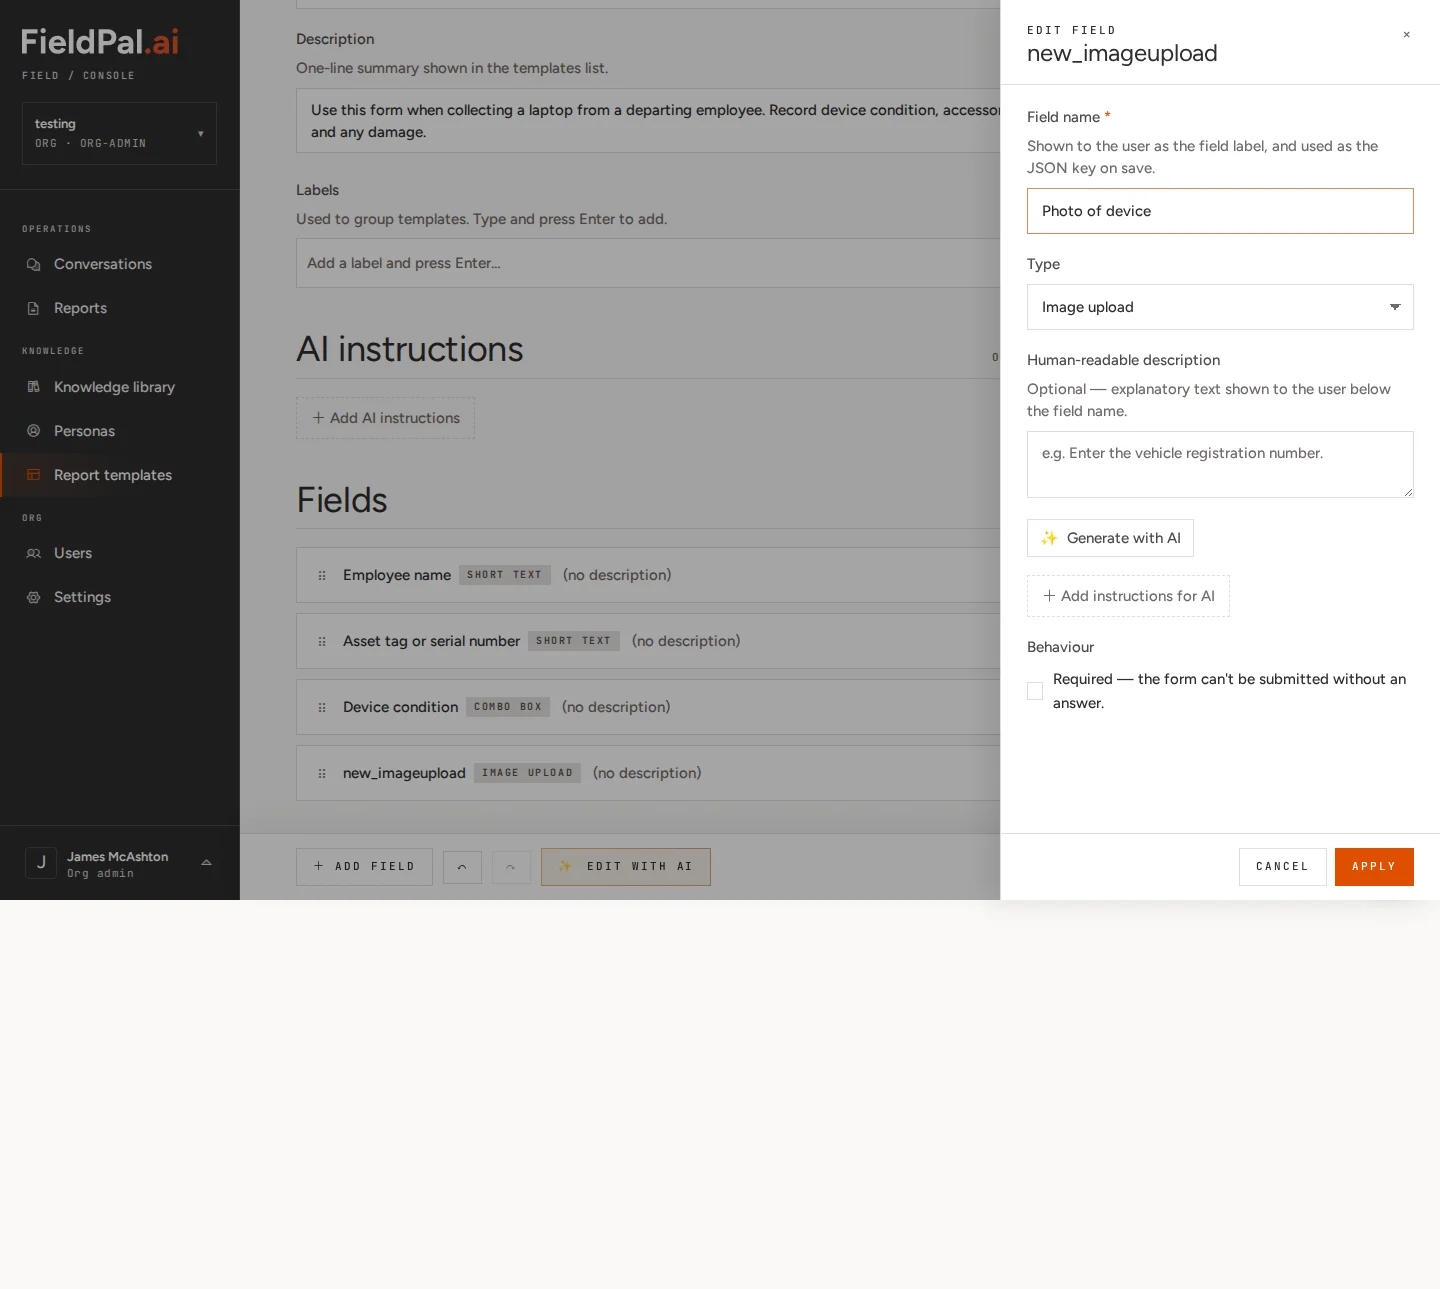 Click **Apply**.
## Step 9: Review your template
You should now see four fields in the Fields section:
1. **Employee name**: Short text
2. **Asset tag or serial number**: Short text
3. **Device condition**: Combo box
4. **Photo of device**: Image upload
Click **Apply**.
## Step 9: Review your template
You should now see four fields in the Fields section:
1. **Employee name**: Short text
2. **Asset tag or serial number**: Short text
3. **Device condition**: Combo box
4. **Photo of device**: Image upload
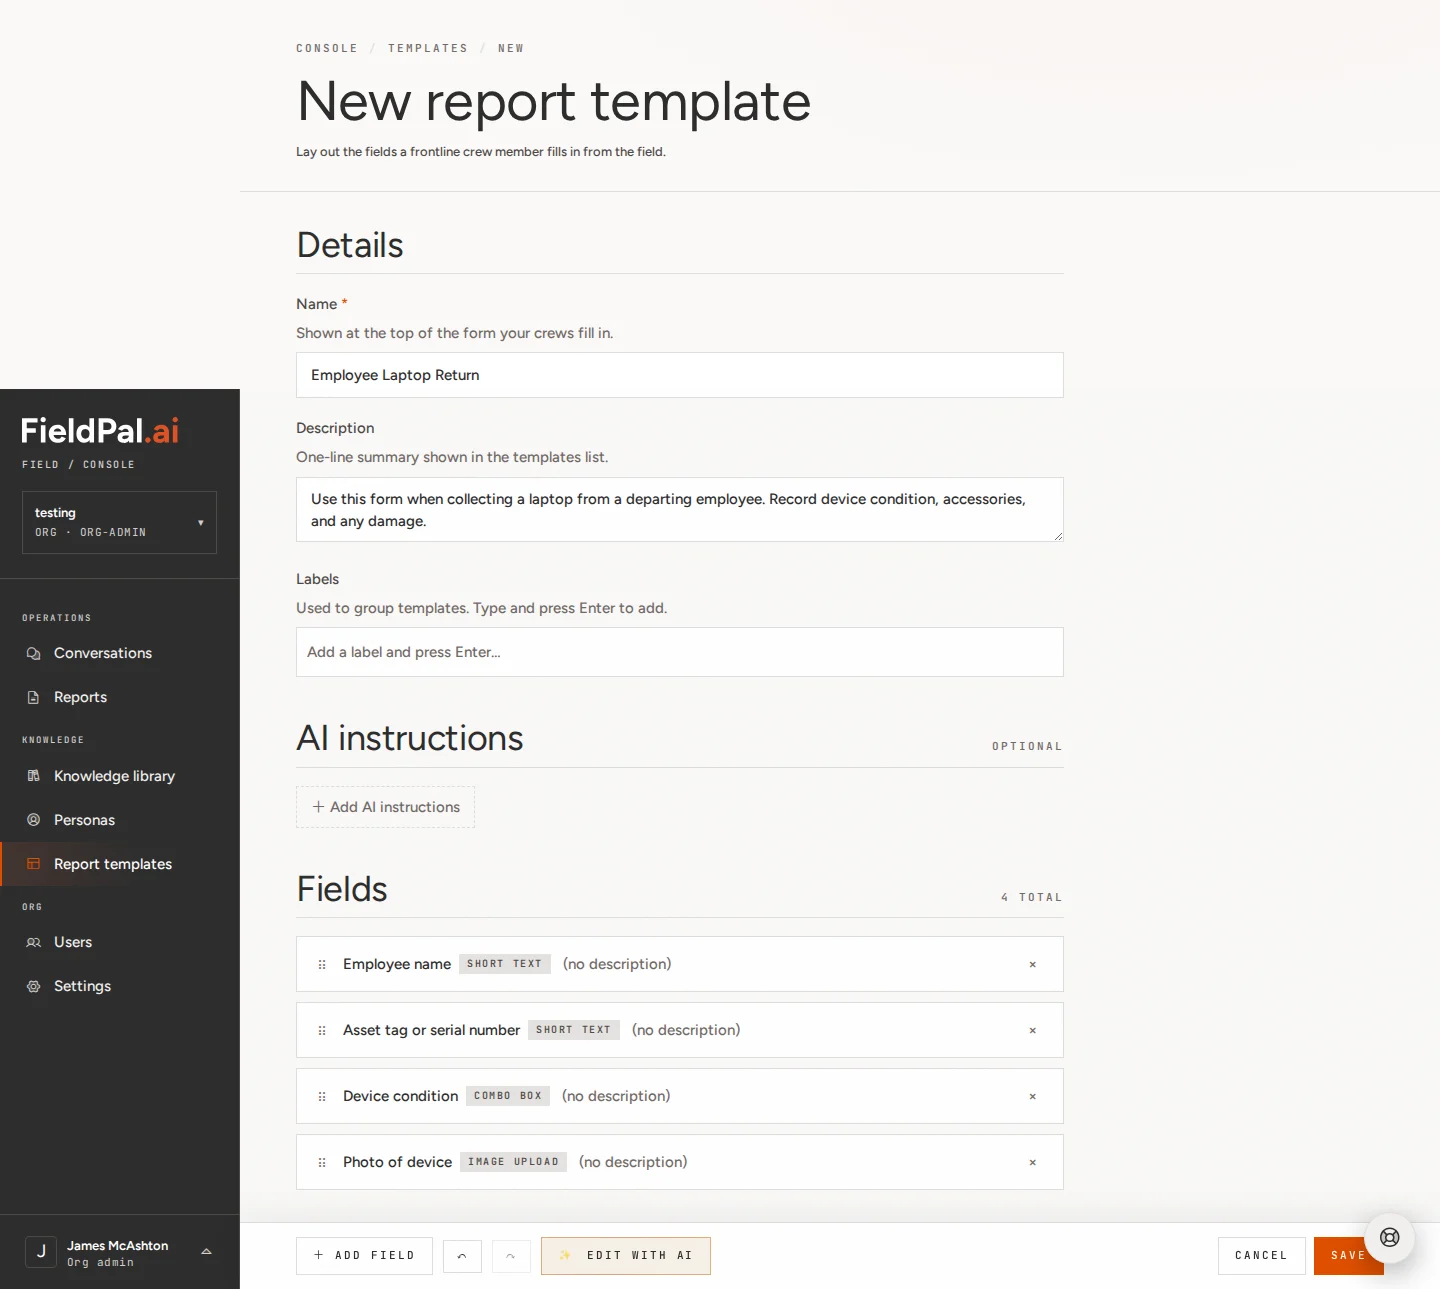 Check the order looks right. You can drag fields up or down using the **⋮⋮** handle on the left of each row.
## Step 10: Save
Click **Save** in the bottom toolbar.
Check the order looks right. You can drag fields up or down using the **⋮⋮** handle on the left of each row.
## Step 10: Save
Click **Save** in the bottom toolbar.
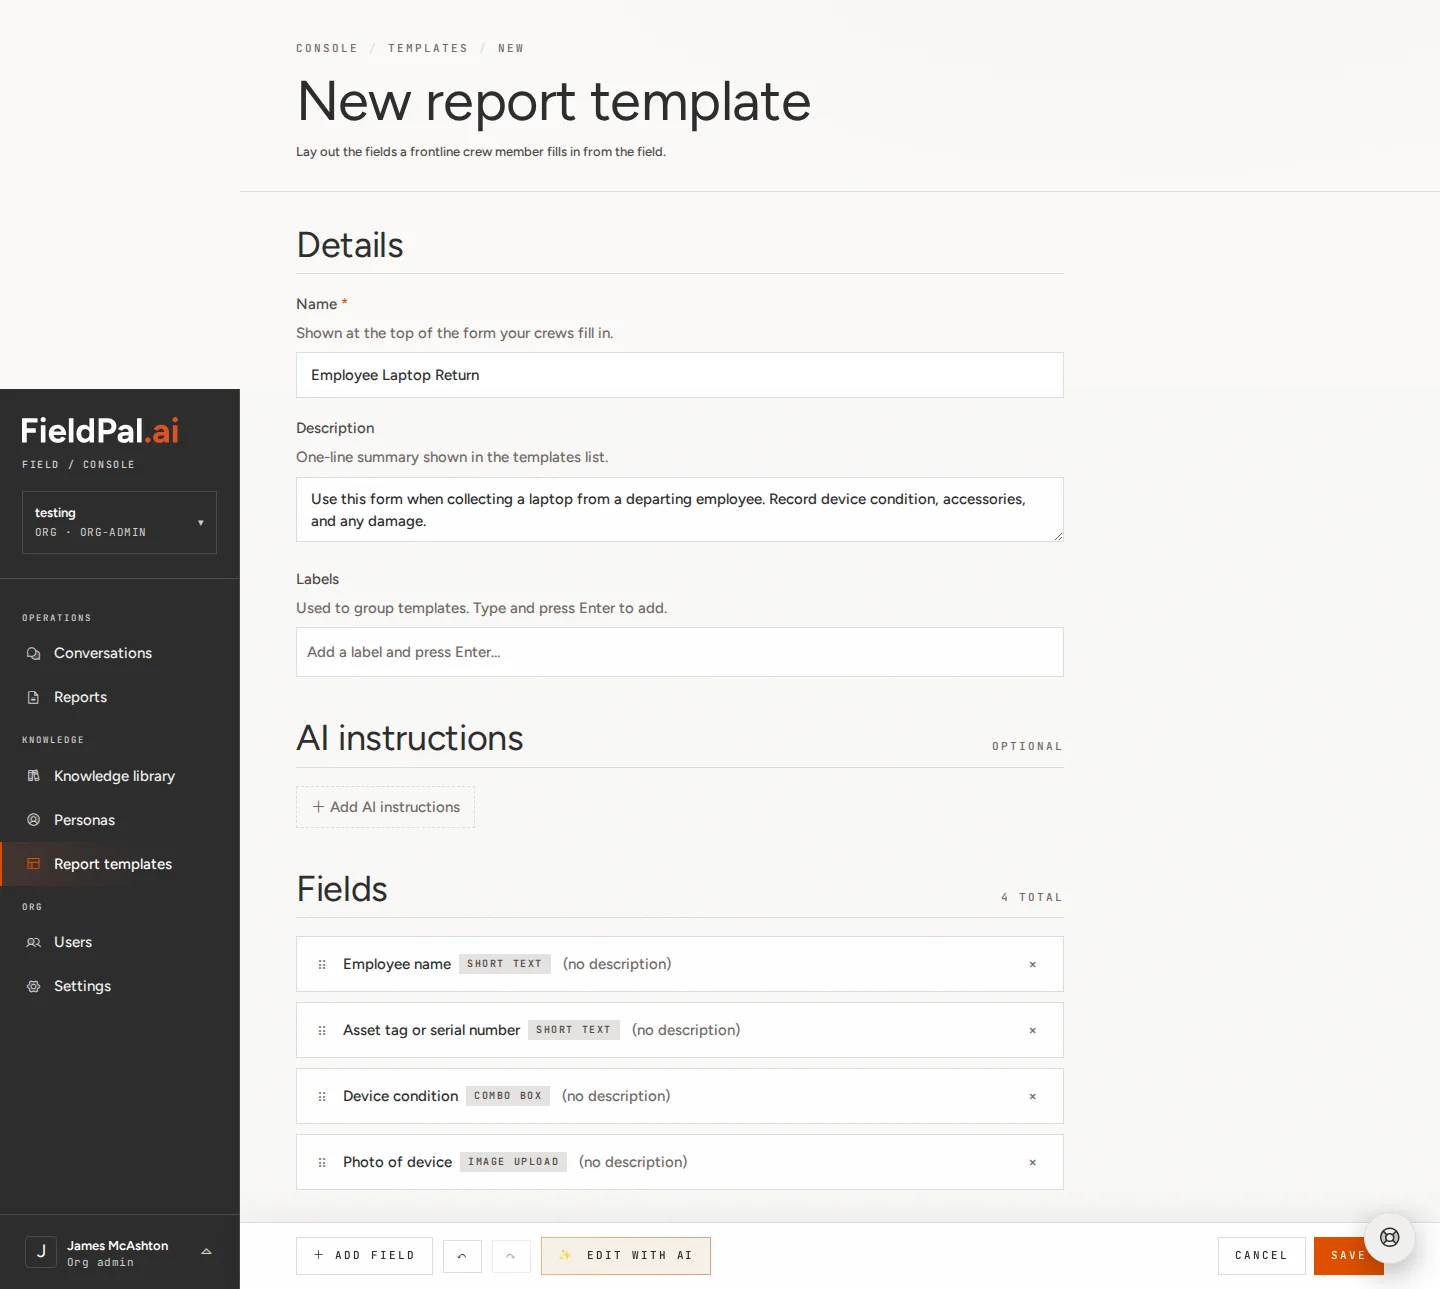 The page updates and the template is now live. Your team will be able to select **Employee Laptop Return** from the app next time they start a new conversation.
 ## What happens next
The template appears in your Report Templates list. From there you can:
* **Edit** it at any time using the pencil icon (✎).
* **Duplicate** it using the copy icon (⎘) to base a new form on this one.
* **Delete** it using the bin icon (⌫) if it is no longer needed.
Reports submitted using this template will appear under **Reports** in the dashboard.
## Tips
* **Required fields**: in the field editor, tick "Required" if the form should not be submittable without an answer. Good candidates: name, photo, any identifier field.
* **Field order matters**: put the most important fields at the top so they are the first thing the field worker sees.
* **Keep combo box options concise**: three to five options is usually enough. Too many choices slows people down on site.
## What happens next
The template appears in your Report Templates list. From there you can:
* **Edit** it at any time using the pencil icon (✎).
* **Duplicate** it using the copy icon (⎘) to base a new form on this one.
* **Delete** it using the bin icon (⌫) if it is no longer needed.
Reports submitted using this template will appear under **Reports** in the dashboard.
## Tips
* **Required fields**: in the field editor, tick "Required" if the form should not be submittable without an answer. Good candidates: name, photo, any identifier field.
* **Field order matters**: put the most important fields at the top so they are the first thing the field worker sees.
* **Keep combo box options concise**: three to five options is usually enough. Too many choices slows people down on site.