

Adding a connection
Step 1: Open the Connections page
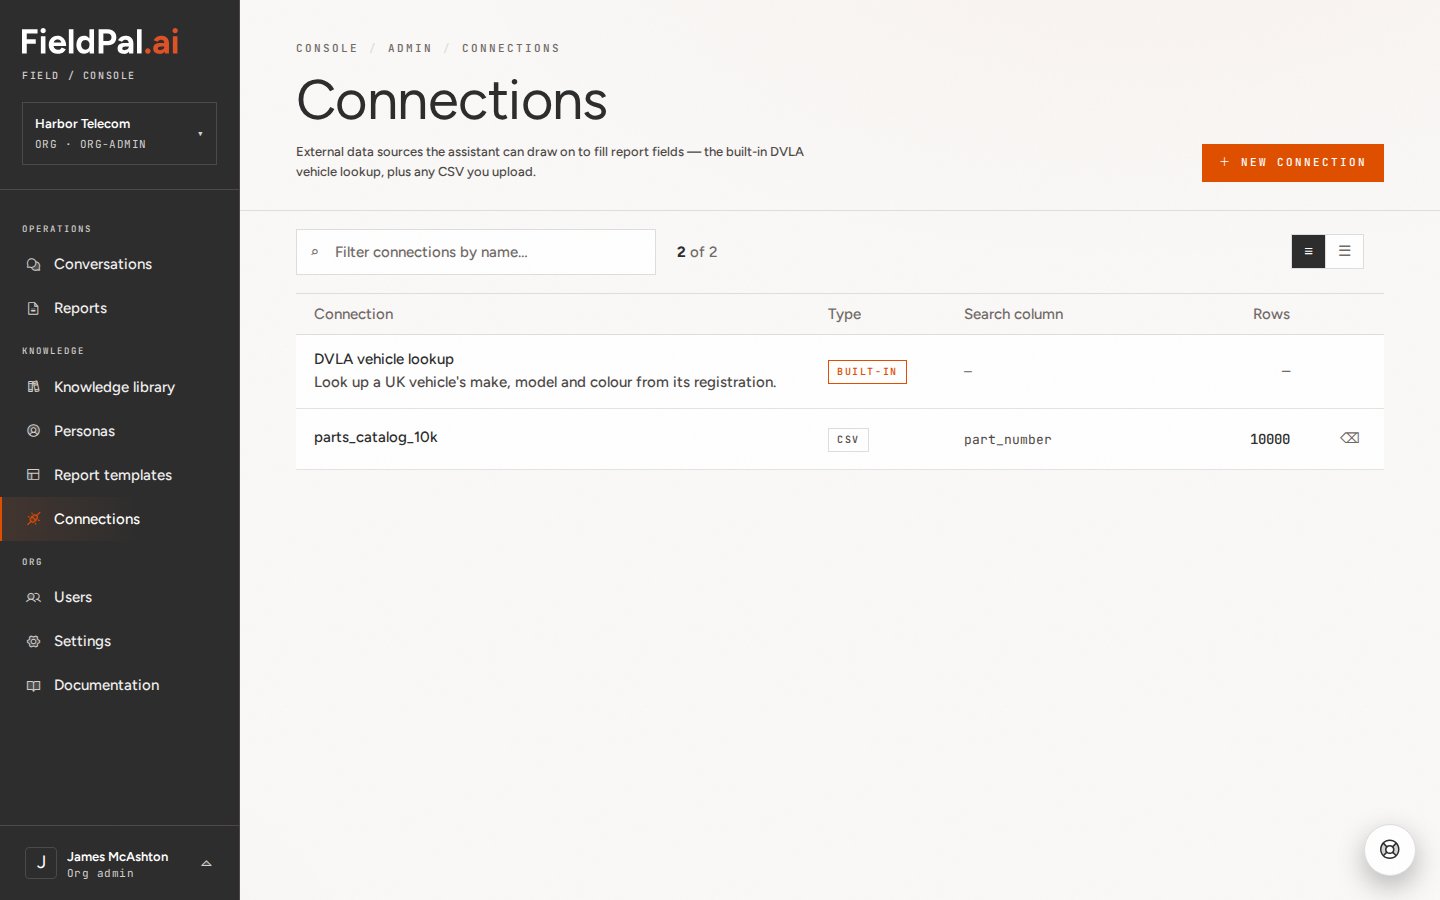
In the left-hand sidebar, click Connections, in the Knowledge group below Report templates. You will see a table of all connections currently set up for your organisation, with columns for the connection name, its type, the search column, and how many rows of data it holds.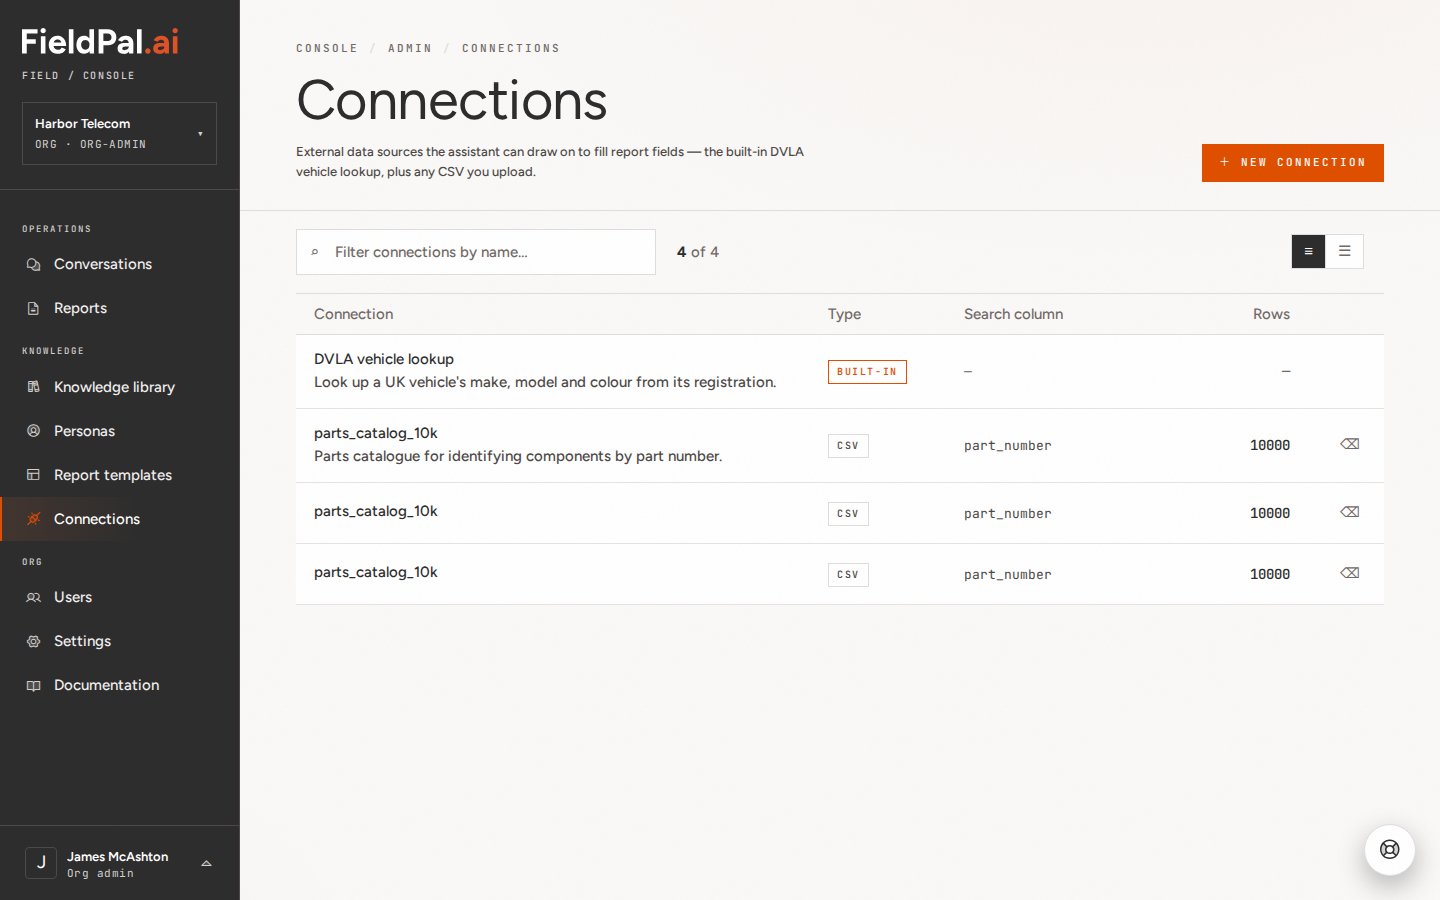
Step 2: Start a new connection
Click + New connection in the top right. A dialog appears asking where the data should come from.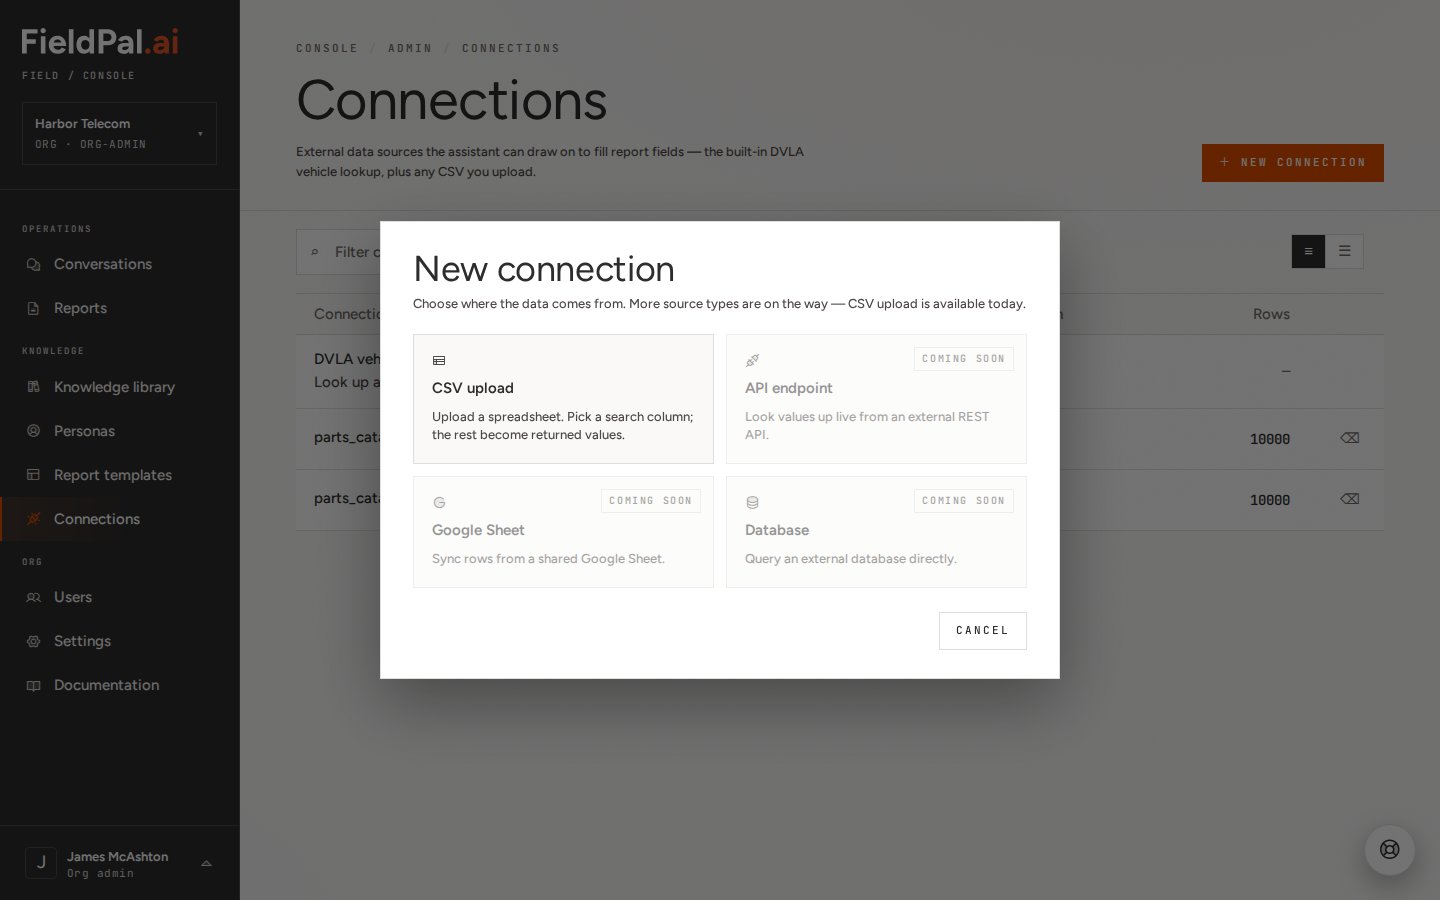
Step 3: Choose CSV upload
Click CSV upload. The dialog changes to a file picker.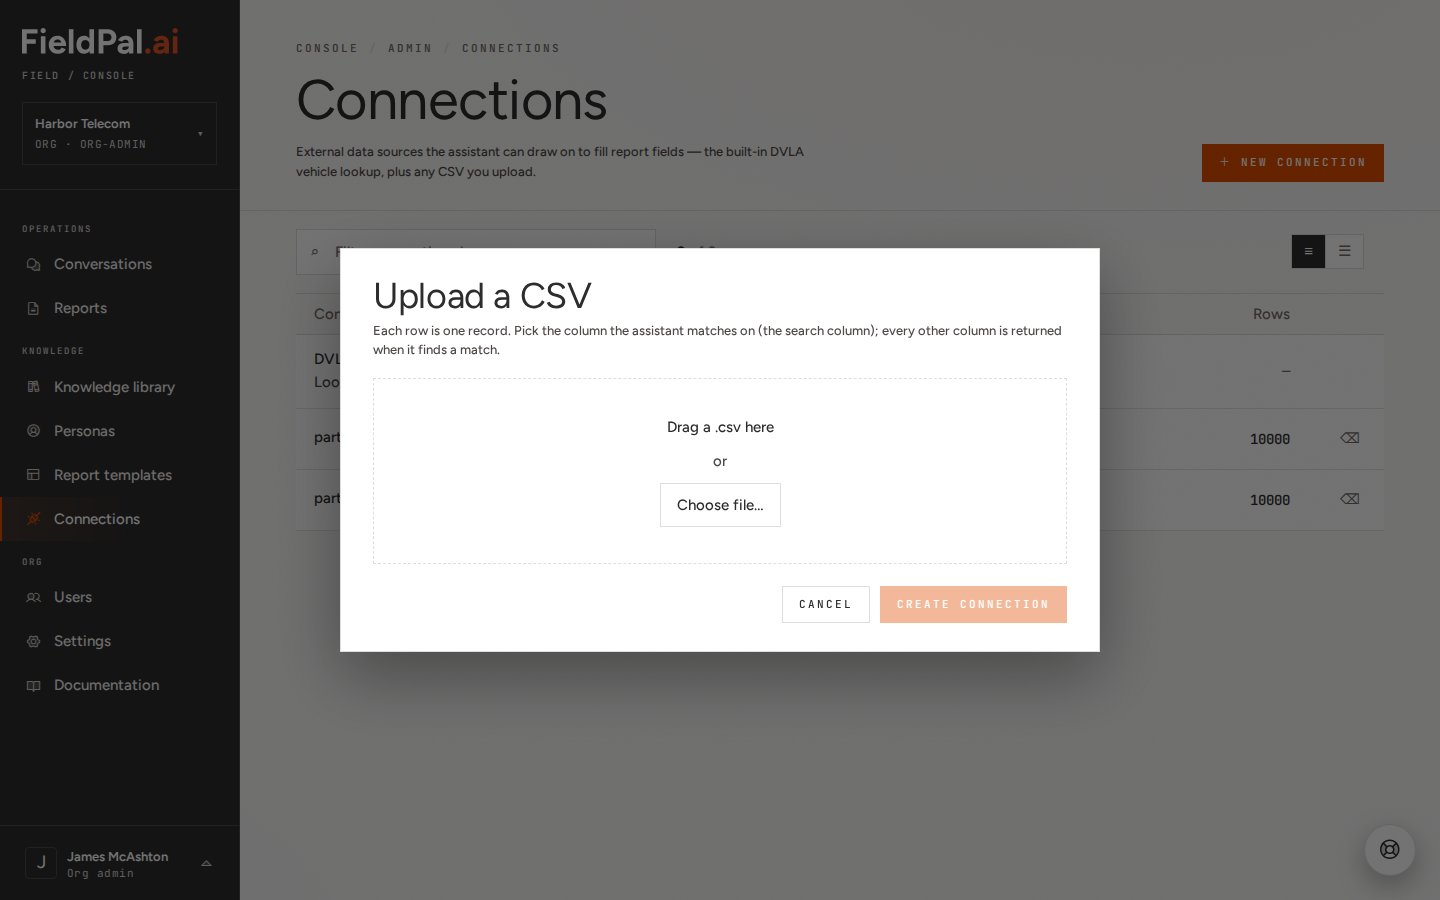
.csv file onto the drop area, or click Choose file… to open your operating system’s file picker.
Step 4: Review the detected columns
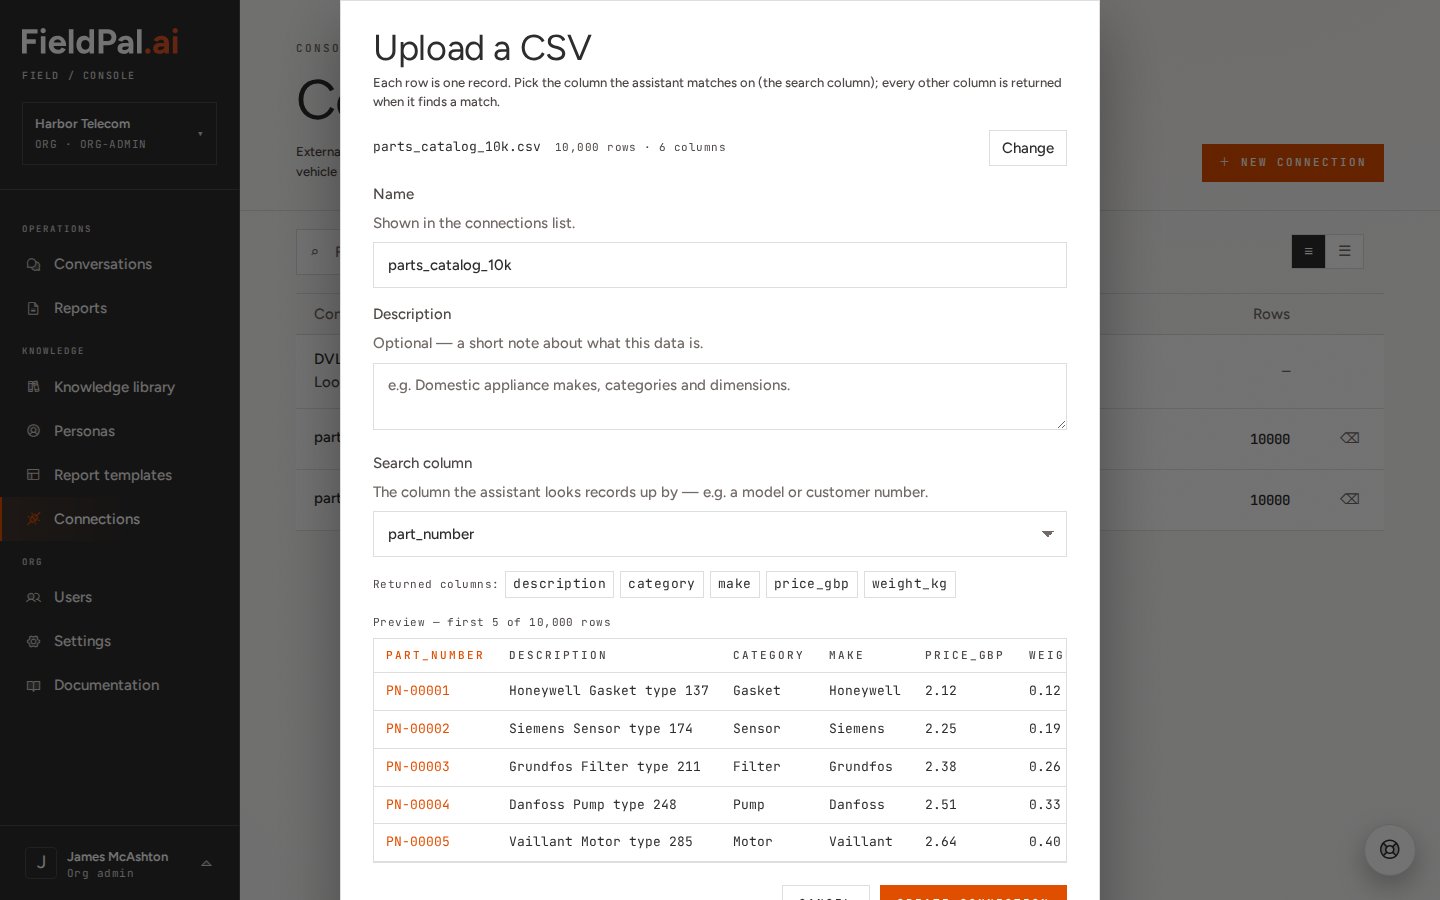
Once a file is chosen, the dialog expands to show:- The file name, row count, and column count, for example “parts_catalog_10k.csv · 10,000 rows · 6 columns”
- A Name field, pre-filled with the file name (minus the extension). This is what appears in the connections list
- A Description field (optional)
- A Search column dropdown. FieldPal auto-detects a likely column (in this case
part_number), but you can change it to any column in the file - The Returned columns: every other column in the file, returned when a match is found
- A preview table showing the first 5 rows
Step 5: Add a description (optional)
Add a short description so other admins can tell what the data is at a glance, without opening the file.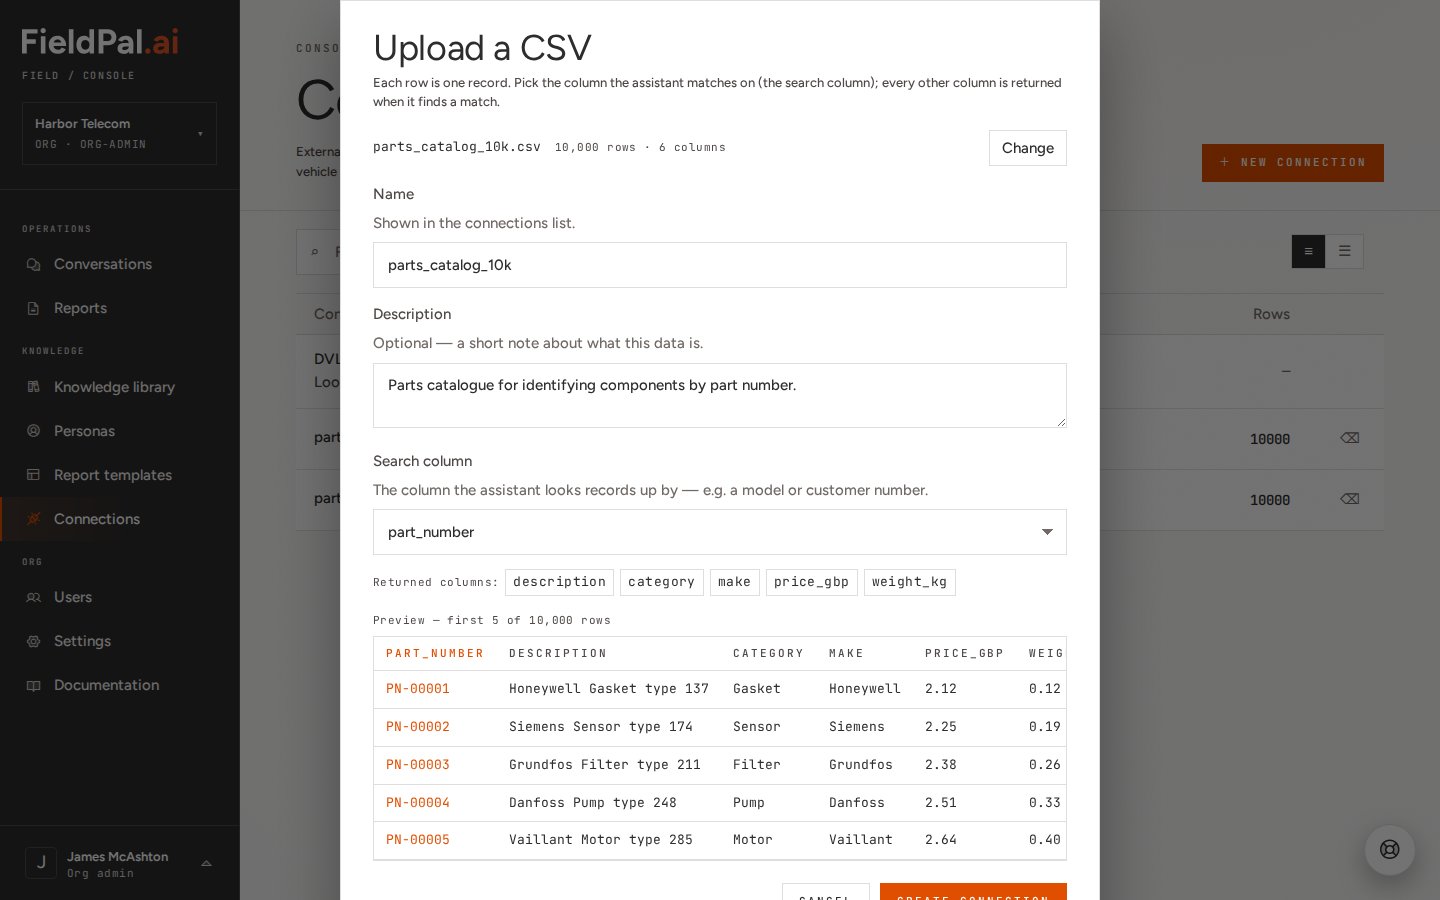
Step 6: Create the connection
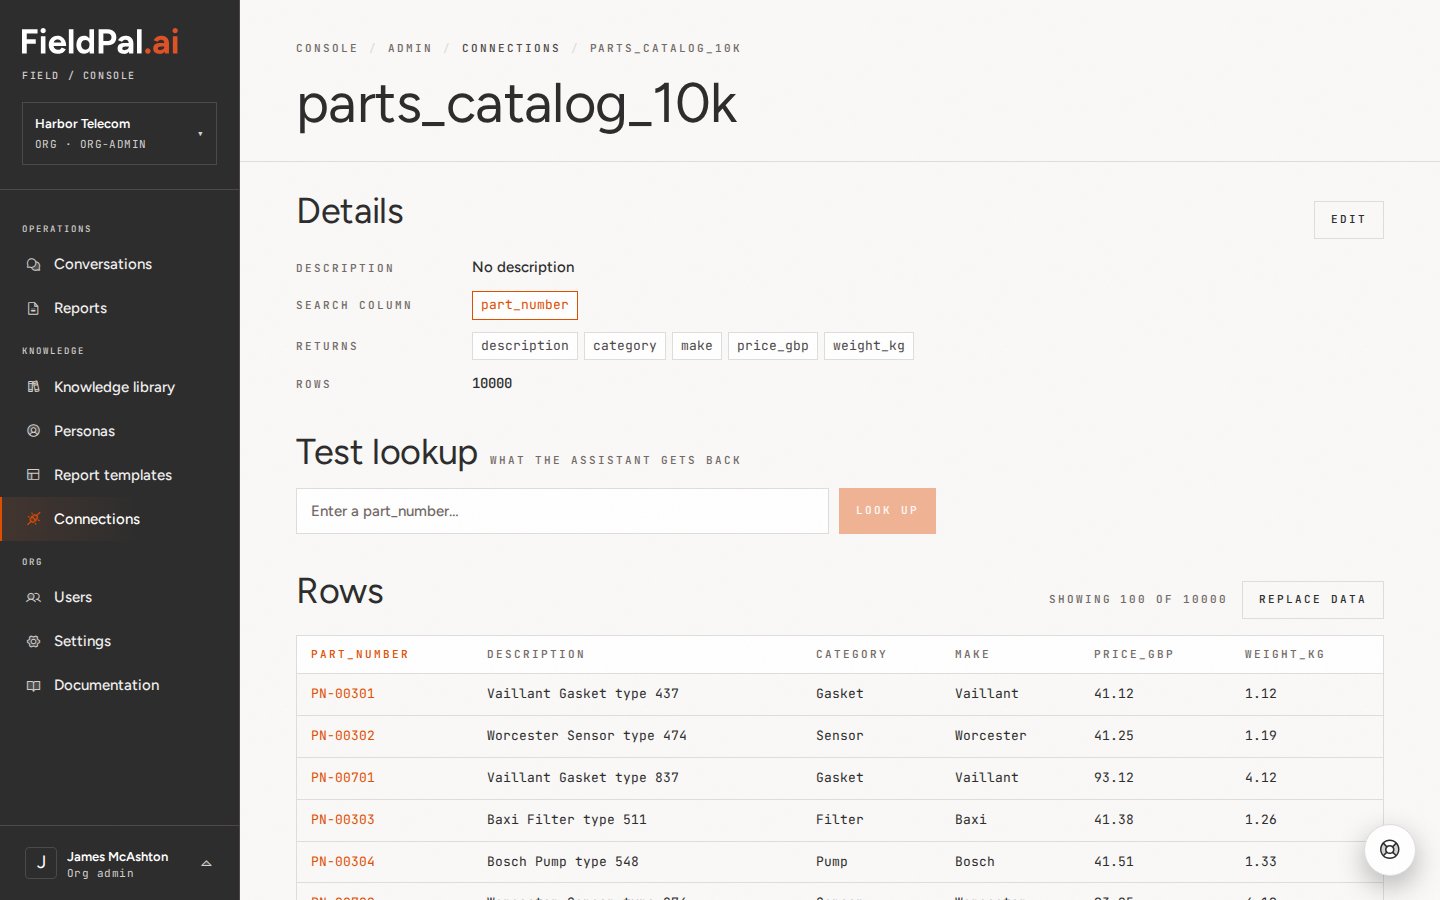
Click Create connection. You are taken to a detail page for the new connection, showing:- Details: description, search column, returned columns, and row count
- Test lookup: type a value (for example a part number) and click Look up to see exactly what the assistant would get back
- Rows: a table of the uploaded data, with a Replace data button to re-upload a newer version of the same file
Tips
- The search column can be changed later only by re-uploading. There is no in-place edit for column mapping. If you picked the wrong search column, upload the CSV again as a new connection and delete the old one, or use Replace data on the existing connection’s detail page if the column layout hasn’t changed.
- Deleting is immediate. The delete icon at the end of a CSV row removes the connection straight away. There is no undo, only a “Deleted ‘[name]’” confirmation toast.
- Only CSV files are supported today. API endpoint, Google Sheet, and Database connections are shown in the picker as “Coming soon”, worth checking back periodically if you need live data rather than a static upload.
- Name your file sensibly before uploading. The Name field defaults to the filename, so
parts_catalog_10k.csvbecomes “parts_catalog_10k” in the list. Rename the file first, or edit the Name field, if you want something more descriptive for other admins. - Built-in connections can’t be edited or deleted. The DVLA vehicle lookup is fixed and shows
—for search column and row count, since it queries an external service rather than a static file.